Tubeless tire conversion
Tubeless tires have been growing in popularity on bikes for some time now, but aren’t specific to bikes, or e-bikes. The agricultural field and others have long been running selants inside their tires (very similar sealants, actually) for many years.
Let’s start with the simplest - why?
Basically, there are four primary reasons to convert - the first is simple: a reduction or near elimination of flat tires. Removal of tubes also allows you to run lower tire pressures without risk of a ‘pinch flat’ which is caused by thr ground and tire compressing and capturing the inner tube between the ground/tire and the edge of the rim - which can happen running lower pressures or when a harder ‘hit’ happens on the bike, wehether from a jump, hard cornering, or even rolling off a curb with low pressure in the tubes. The third reason is weight reduction - while you do gain some of it back in adding sealant to the tires, overall weight is a fair amount less tubeless versus tubed wheels.
And then there’s convenience - no more carrying around tube patch kits and spare tubes
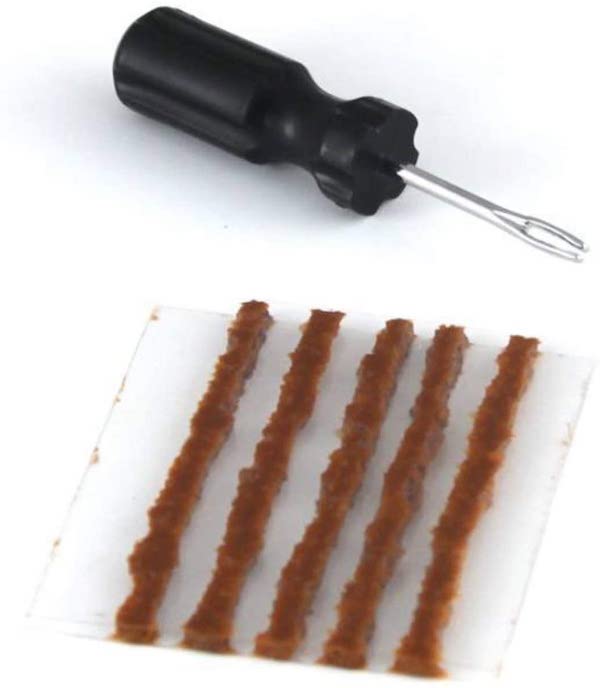
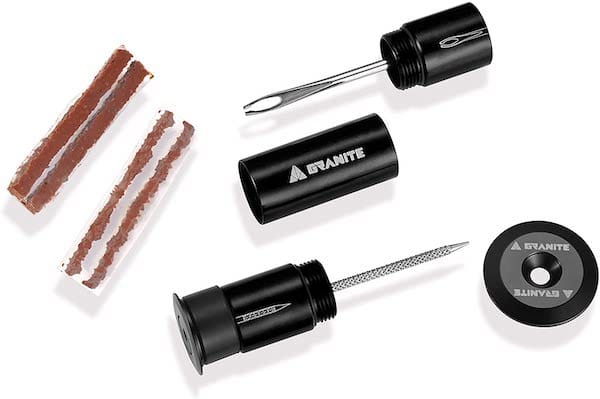
Ok, so that one may not be entirely true. There are tubeless patch kits, affectionately-ish called ‘bacon strips,’ but they’re a lot easier to use and don’t require breaking the bead from the wheel or fiddling trying to get a tube out and then back into the wheel.
Some also still continue to carry a spare tube with them - depending on where you ride, this may be purely out of an abundance of caution or may make sense. Tubeless tires in general will soak up most forms of abuse form thorns, nails, screws and the like, and self-seal themselves, but there are limits - longer gashes probably won’t be able to seal themselves up, so a tube, or even a trail/roadside hack using tape - can still save a walk home now and then.
How do tubeless tires work?
Wheels are constructed by connecting spokes from a bike hub to the rim, the circular metal or carbon ring the wheels rest on. The spokes are tensioned uniformly to make the collective wheel a relatively solid and strong assembly. The spokes are attached to the rims via holes drilled in the rim and to ‘spoke nipples.’ There is one larger hole drilled for an air valve, either a Presta valve (skinnier) or a Schrader valve (like your car has, wider than Prestas).
With tubed tires, the valve goes through the larger hole, inside of the tire, and is itself a sealed environment that gets aired up inside your tire.
You’ll notice I mentioned the words ‘drilled’ and ‘holes’ up above a couple of times - obviously, any holes in the part holding pressurized air will let it out, like a thorn in a tube needing to be patched.
Tubeless tires essentially seal off the spoke holes in the rim, and use a latex rubber-based liquid to seal up smaller holes, as well as actively being able to seal new holes as you ride. It’s actually rather clever. Now, some people will swear by one brand or another of sealant, or ‘milk,’ but for the most part, it’s the latex doing the sealing, so unless overly diluted, most will perform similarly - at least within a normal temperature range. Brands do add different additives, mainly for viscosity and ‘added chunks’ from walnut shells to glitter, which can have an impact on the size of holes/punctures each is able to address. In general, most can handle punctures up to ~1/4” or 5-6mm in diameter.

How long does it last?
Well - it depends… most manufacturers will make some claims as to longevity. The typical claim more or less is ~6-12 months. Most just ’top off’ the sealant periodically, adding a bit more sealant into the tire every few months, while some remove one side of the tire, or go in from the valve to remove old sealant. Others have a routine of a yearly removal of tires and a deep clean of all old sealant.
If you have the tire off the bike and can shake it and not hear any liquid, you can ’top it off’, or just go ahead and add ~25% of the original amount for initial sealing - every 3months as a general guideline. Some sealant brands will dry up sooner than others, but also different tires have different porosity so your specific ‘ideal’ #s may change - but add if you can’t hear any liquid inside.
I just top off every few months or when I seem to be losing tire pressure and when I swap tires or yearly, will pull one side of the bead off and wipe out any ’snot’/chunks, then refill with sealant.
If you are later changing sealant brands, some say to do a more thorough job of removal, like a wet rag and brush or even isopropyl alcohol, but I’m not all that concerned about it myself.
One thing to note is each brand may have it’s own shelf life - so if you have old bottles of sealant by the time you get around to using it, you definitely want to ensure you shake it well, but if it’s mostly solids - it’s probably outlived it’s shelf life.
What are the downsides?
Mostly, the periodic maintenance of topping off the sealant, and also the at-some-point removal of old sealant, as this does require removing the tire from the rim, or at least one bead. Once the sealants have dried completely the inside of the tire will have effectively a solid latex/rubber-ish coating on their insides, which is fine, but you may have some chunks or a pool in one portion of the wheel.
Changing tires out can be messy if not taking care. The easiest way to do this is to move the tire so the valve stem is at the bottom/on the ground, remove the valve core using an appropriate tool, and using a syringe, suck out the sealant, then after removing the first bead on the tire, mopping up and remaining liquid sealant before removing the tire fully for replacement - in reality, it’s not that big of a deal.
Occasionally valve cores can get clogged from the sealant. They can usually be cleared by even a small air compressor and air chuck, although doing it via hand pump may be more difficult - but valves are inexpensive to replace occasionally if needed.
Are all tires and tubes able to run tubeless?
Not all. Both rims and tires themselves may be called out as being tubeless ready, tubeless compabitible, while some brands have their own naming, such as WTBs ‘TCS’ system. However, even if a rim is not specifically called out as ‘tubeless ready,’ it may still be. With the wheel off, if the spokes on the inside of the rim sit below or at the same level as the rest of the rim’s inner surface, there’s a good chance you can use them for tubeless. Likewise, not all tires may be specifically marked as tubeless-ready or compatible, but many to most can be made tubeless. Those with particularly thin or porous sidewalls may absorb more than the base amount of sealant recommended for a give sized tire, but most can still be made to work, as long as the combination of rim tape, rim and tirecan get a collective good seal - the sealant will fill in any small gaps.

What do I need?
Required Tools and Parts
Tools to remove your front and rear wheels from the bike - you may have quick-release levers or thru-axles requiring an allen head.
Tubeless Sealant of your choice - the popular one is generally Stans, or I use Cream II Tubeless Sealant. Tire size will matter but assume ~3oz per wheel or so.
Tubeless sealant syringe - some tubeless kits come with one; if not, buy one - you could just dump inside the tire, but using a syringe with a properly-sized tube makes life easier, and cleaner!
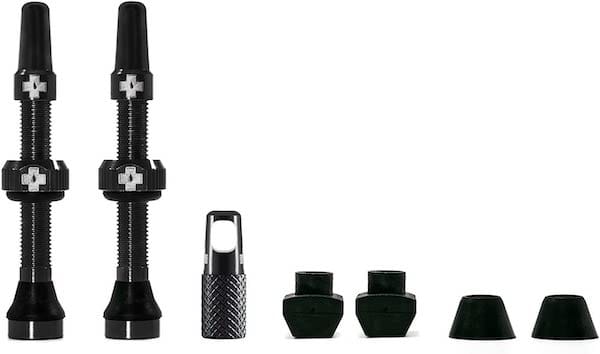
Tubeless valves, 2 - ideally ones with extra seals to ensure you can fit to your rim well
Valve Core Remover
Tire levers - plastic
tubeless rim tape - close to your inner rim width. Most MTBs are ~30mm inner width. Alternative some swear by is Gorilla tape - can probably use others as long as they are generally sticky and mostly non-porous.
Scissors or razor blade to cut rim tape
Rags
Denatured Isoproyl alcohol or other cleaner (desired)
Very helpful - small air compressor (with appropriate Presta or Schrader attachment), a ‘charger’ type hand pump, or worst case, potentially a lot of work + a normal bike pump - the problem is in getting the beads to seal initially.
Small Spray bottle with water and a bit of dishwashing soap
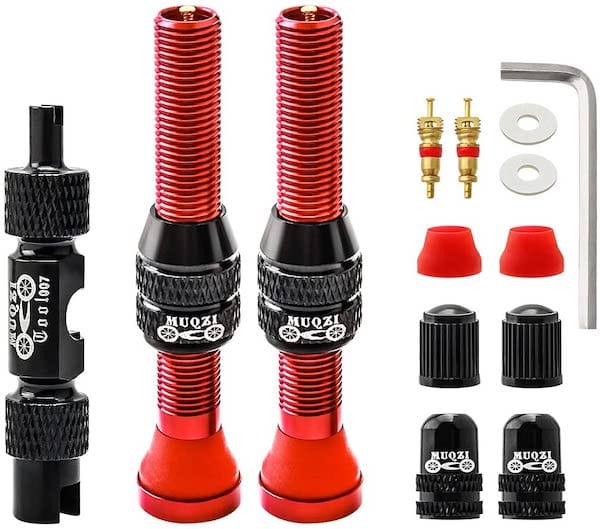
What if I have Schrader valves in my rims?
They do make tubeless Schrader valves, like those shown at the right. Some have tried to use ‘recycled’ Presta valves cut from a tube with some tire rubber left surrounding the valve stem. I’ve used normal Presta valves on Schrader-drilled rims but only with valves with wider inner seals.
Let’s do it!
1. NOTE: If you’re installing new tires, versus making the current tires tubless, go ahead and remove from the box and lay them out in the sun - it will help soften them a bit and make them easier to go into the rims.
2. Remove the wheels from your bike. You can do one at a time, but considering part of the process should include an overnight ‘does it hold air?’ test - it’s really better to do both at once.
3. (Optional) While you have the wheels off, it’s not a bad time to check for spoke tightness, clean the rear cassette or clean and re-grease your hub bearings.
4. Using the valve core remover, remove the valve cores from your tubes. Just unscrew the cap from the valve, and if Presta - unscrew it by hand first, then use the right end (for Presta or Schrader valves) of the removal tool to unscrew the valve counter-clockwise. You can let the air out manually beforehand, or if not - make sure to keep pressure on the remover and let the air out before fully unscrewing it.
5. If there is a retaining nut on the valve (there should be!), go ahead and remove it.
6. Now for the ‘fun’ part - first up is getting the tube out. In order to do that, we’ve got to get at least one side of the tire free of the rim. Put your hands on the far side of the rim and push inwards with your thumbs or palm on the tire just above the side of the rim facing you. It may take a little working, but you should be able to push the tire inwards with some effort. Just get the one side free for now.
7. Once one side of the tire is free and pushed towards the center of the rim, push the valve stem to the inside of the rim, grab it and basically pull the tube out. The valve core should still be out of the valve, so it should naturally remove any air from the tires as you remove the tube.
8. Once the tube is out, turn the wheel over, and push the other side of the tire towards the center of the rim. There is a channel at the center of the rim where it drops inwards, and this area is important for both tire removal and later re-installation.
9. Now you want to get one side of the tire outside of the rim. You may be able to do this by hand, or using a plastic tire lever, you can lever under the lip of one side of the tire, then pull to the outside of the rim, then bring the lever around the outside of the rim until that side is off the rim. Reach underneath and repeat for the second side of the tire - if it’s difficult to get a lever under or pulling off the side of the rim by hand, move the tire edge into the center channel first.
10. If re-using the same tires, lay them in the sun or sunlight, or somewhere warm - again, this will help soften them up a bit for the re-installation.
11. Take a rag and wipe down the inside of your rims. If there is a ‘rim strip’ in there, remove it - this is not the same as tubeless rim tape! Dab the rag in isoproyl alcohol or other cleaner, and get the inside of each rim, including the edges, clean!
12. Now, on to the tubeless rim tape. Hold the wheel in front of you and position the hole for the valve stem at the 12 o’clock position. What you’re going to want to do here is start 6” or so counter-clockwise from the valve core hole, wrap the tape tightly around the rim, go past the starting point, and then finish the ‘wrap’ 6” or so clockwise past the valve core, so you wind up with a total of 12” or so of total overlap.
13. Before doing this, check your tape width is reasonable - ideally, you’ll want the tape to be the full width inside the rim, as going right to the edge will also help slighly in sealing the edges of the tires to the rim, but at the very least, you should have the tape cover the majority of the width of the rim.
14. Also before touching the tape to the rim, work out how you’re going to work the tape around the wheel. I’ve done it sitting on a step or stool with the wheel perpendicular to me, rotating the wheel waya from me while pulling the tape tight with my other hand, or done it on a table, a soft vice on the axle, or with a truing stand. Figure out now how you’ll keep the tape tight as you go before putting the tape down on the wheel.
15. Go ahead and put the tape on, keeping it tight and centered as you rotate the wheel. Go slowly, put some tape down and run your finger down the center of the rim to flatten out the tape, or you can do the full wrap tightly and then go back and push your thumb down and work all the way around the wheel. Either way, rub your thumb along the tape to flatten it as much as possible, especially over the spoke holes. Small bubbles are ok, but work out as many as you can.
16. Move on and do the same to the next wheel.
17. Now you’ll need to make a hole or ‘X’ for the valve stem. People have different preferences - I use an awl close to the diameter of the valve, and pop a hole through the tape into the rim’s valve hole. Others may make a small ‘X’ slit over the rim’s valve hole - just go on the small side, as pushing the valve in later will open it up a bit if needed.
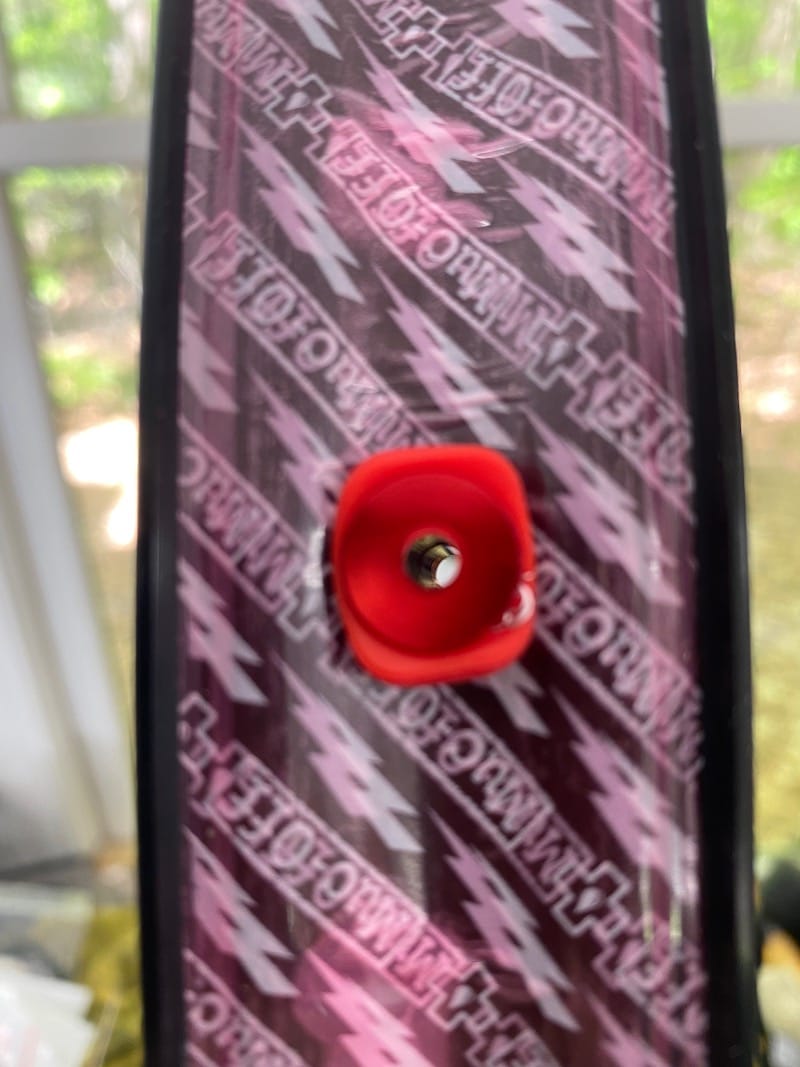
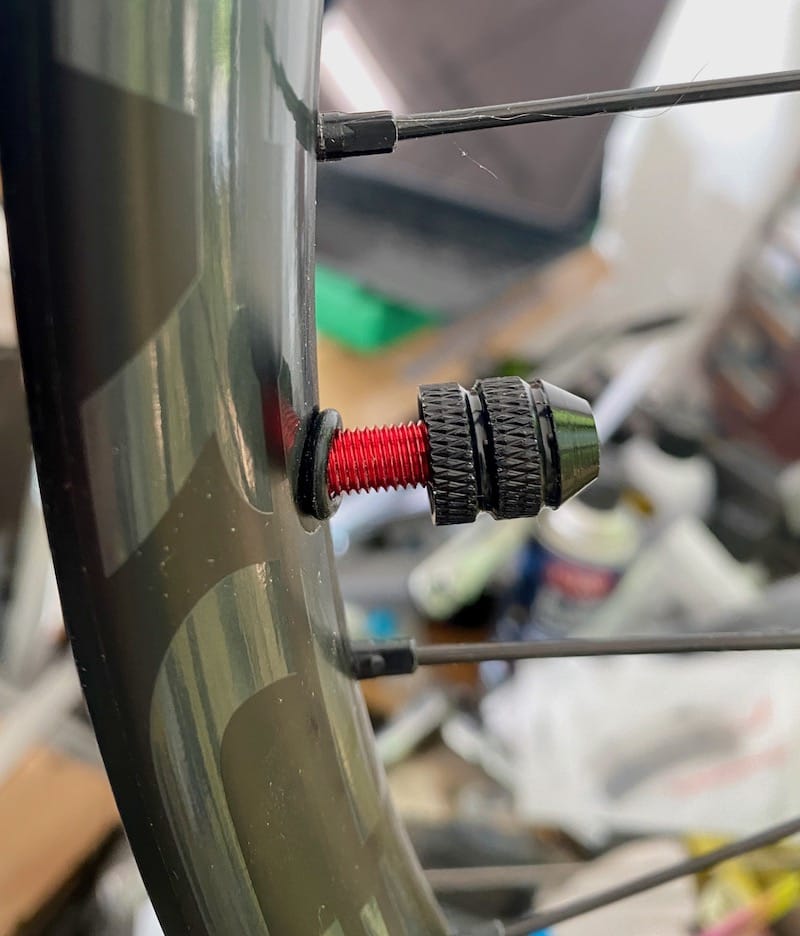
18. Now, go ahead and look at the fittings that came with your tubeless valve cores - the rubber or silicon pieces possibly already on the valve stem. If there are other optional pieces, find the one that most matches the curve of the inside of the rim, push the valve through the tire from the inside, then on the outside, put the O-ring and round nut, and tighten it by hand. You’ll want this to be pretty snug, but don’t need pliers - ’tight by hand’ should be enough.
19. Ok - it’s time to get the tires back on! Spray the tire lips down with the soapy water - it will help getting them on as well as when we set the beads. Remembering what was mentioned about the ‘center channel’ on the rims, get one side on first. If/when it gets tight, position the tire so most of it’s lip is sitting in the center channel, and you should be able to get at least the first side on by hand in most cases. If not, go ahead and use the tire lever, but still push the rest of the tire lip to the center of the rim.
20. Repeat the same process for the other tire lip until the tire is loosely sitting on the rim.
21. Now we want to make sure the tire beads seat properly before messing with the sealant. Go ahead and spray the tire lips/beads with the soapy water if needed, and press the tire so one side is out of the center channel and all of the way against the lip of the rim - turn the tire and get it as close to seated as you can.
22. Now we’ll need some air pressure to seat the other side. Remove the valve core and set aside in a safe spot for now. Ideally, you’ll do this with an air compressor (reduce pressure to 100PSI or less), or at least a tire ‘charge style’ of pump, pumping up to 80PSI or so (start there, go higher if needed), and putting air in the tire - you should both see the tire expanding and hear some popping sounds - don’t freak out; these are the tire beads popping onto the edges of the rim. Once you see the tire is seated, you can remove pressure. Turn the wheel and make sure it’s seated everywhere - sometimes a spot may hang up…that’s ok, hit it with a bit of soapy water, then again use the compressor or charger pump to add pressure until it pops into place.
23. We’re almost there! With the valve core still removed, and after doing another check to make sure the beads are fully seated all around the rim on both sides, go ahead and grab your sealant. IMPORTANT: Shake the sealant thoroughly for a few minutes to make sure the liquids and solids are all combined properly! Check the manhfacturer’s instructions for your specific tire size - for 27.5 ‘plus’ MTB tires, like 27.5x2.8” it’s usually somewhere around 3oz, and don’t worry too much on this - going a bit over is OK.
24. Grab your syringe applicator and load it up with enough for one tire, and get your valve core and valve core tool handy, along with your compressor or bike pump. Put the wheel vertical with the valve at the bottom/6 o’clock position, insert the tube from the syringe, and push the plunger to push the sealant or ‘milk’ inside the tire. Set the syringe aside, put the valve core in and tighten the valve core by hand. Now put ~1/2 of normal pressure into the tire - this isn’t a scientific number, but e.g. for a tire ranging from 20-45PSI, go ahead and put 15 PSI in for now.
25. What we’re looking for now is any obvious air leaks. Go ahead and rotate or swirl the tire around a bit, and make sure you don’t have an un-seated tire bead, or you’ll have to re-pressurize it. You can spray the outside of the tire with soapy water again to help locate any leaking areas, and don’t worry if you see some spots where the sealant seems to be ‘weeping’ or coming through the tire in spots - some tires may have tiny holes or be more porous - the selant will seal it up. If you see an area bubbling (from the soap water spray or see sealant and bubbles coming out), tilt that portion down so the sealant inside the tire reaches it and it should seal up. Repeat with any other areas.
26. Now, go ahead and pressurize the tire to it’s max rated pressure. Once done, swirl or rotate the tire around a bit to make sure the sealant touches all areas of the inner surfaces, and then set the wheel aside with the valve stem at the top of the tire! It’s better to stand the tires and keep the valve on the top to make sure there’s no pooling of sealant in the valve core causing it to clog.
27. Repeat for the other tire, and then we’re waiting for ‘the overnight test.’ Wipe down the wheels/tires on the outside to clean up any sealant then put the tires somewhere, preferably not freezing or below, and let site for 6-12+ hours.
28. Check the tires the next day or after waiting 6-12+ hours. You may see some more sealant weepage, which is OK - what we’re looking for is did the tire hold the pressure overnight? If it didn’t seem to lose any pressure or very little, you’re good to go! If it lost more than a few PSI of pressure, check to see where the sealant has been leaking out, or increase the pressure back to maximum, swirl the tire around again, and spray down with soapy water after shaking to make sure all selant hasn’t leaked out. Wherever you see bubbling, rotate that part of the tire downwards, and again let the sealant seal it. If it seems all sealant has leaked out, this is usually a bad bead seal to the rim, or in some cases, a tire that is extremely porous. You can remove the valve core and add more sealant and try again.
29. Clean up the rims and tires, remount and off you go.
30. Check your tires regularly for pressure and if you start to notice dropping pressure, remove the valve core, add ~25% of the original fill, re-pressurize and keep riding - in most cases this won’t require wheel removal.
31. As you ride, you will lose some sealant as it fills what would otherwise have been holes, and sometimes tures can also ‘burp’ sealant if running extremely low pressures and riding aggressively. Follow manufacturers instructions or every ~6 months, go ahead and add another 25%, or if/when you appear to be losing pressure in the tires more often.
Note: While properly set up tubeless tires can save you from a lot of otherwise flat tires, you should still have a tubeless patch kit - sometimes called ‘bacon strips,’ for larger punctures through the tire, pushing a strip into the hole can help the sealant do it’s job and get you home!


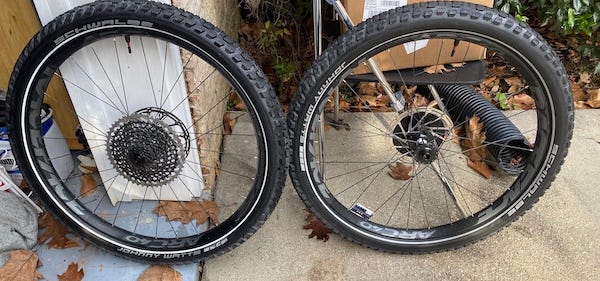
Another tubeless build
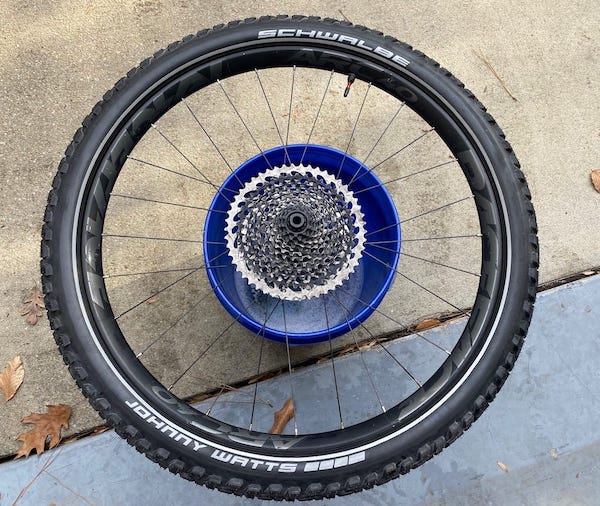
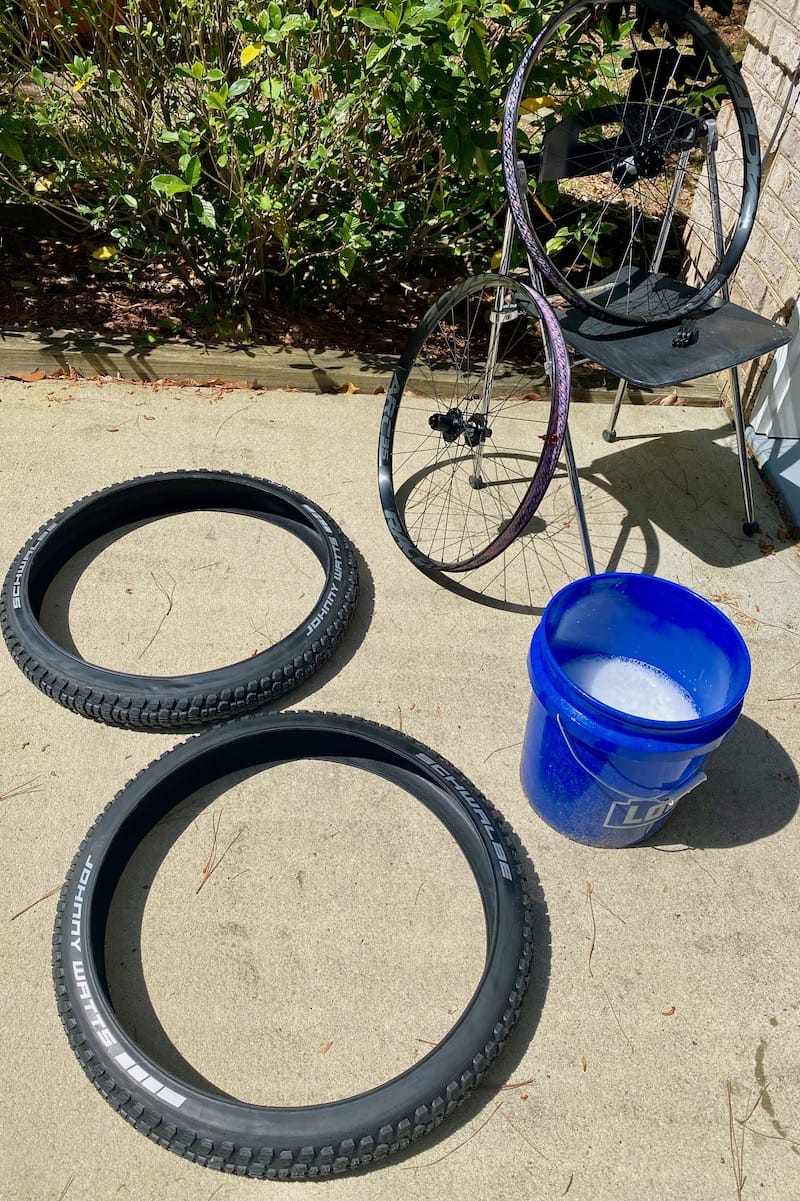
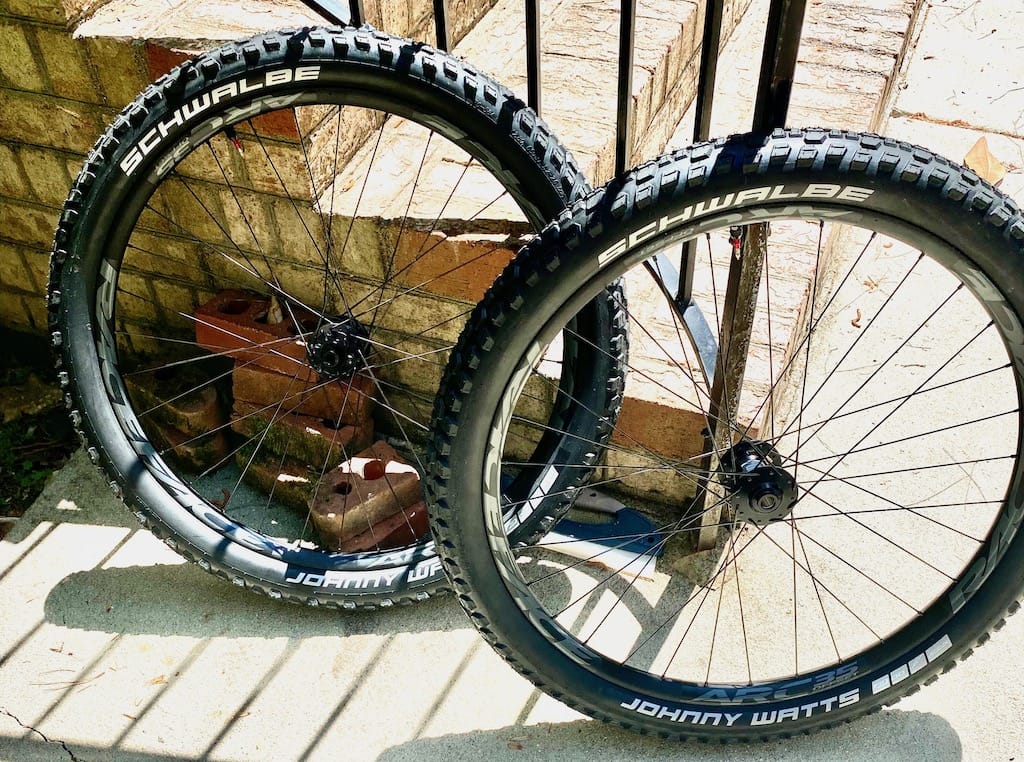
I built another wheelset for my X2 so of course it was going to be tubeless from the start, this time DT Hybrid hubs and another set of ARC rims - this time ARC35s, along with Johnny Watt 27.5 x 2.8” tires, as I’ve been liking them for ‘dual sport’ on and off-road use so far. Same valve stems as the conversion above, same tubeless 35mm tape. Ideally the tape is a couple mm wider than inner rim width, but as long as you’re fully sealing the spoke holes and ideally the tire edges/beads are at least sitting down on the tape, you should be good, IMO.
First off, I always put the tires in the sun - letting them warm up a bit can make the difference between needing to deal with tire levers or not needing them at all (assuming a bit of hand strength).
I used the truing stand to tape the wheel - clean the rim bed with some isopropyl to remove all greases (including from fingers), start a few spokes beyond the valve hole, keep tension on the tape, and do 8” or so at a time, keeping the tape centerered in the rim and tensioned with one hand, holding the rim from spinning and pressing the tape down with the other. Most rims have an indentation towards the center - you want to make sure you get the tape pressed down to cover the rim bed over the spoke holes, then go around a few times after you complete taping the wheel, going past the valve stem hole by a few spokes in the other direction then cutting the tape. You can carefully use a heat gun if you’d like; a few wrinkles and bubbles isn’t the end of the world, and as you add the tires and pressure, this will help to push the tape down further, but get it the best you can, and don’t be afraid to lift the tape back up on a section while taping in order to correct it from going off-center, or to decrease bubbles.
I used a small awl to start the valve stem hole through the tape, making sure it’s centered over the hole in the rim, then used the valve to open the hole further if needed. Press down on the backside of the valve to squish the valve down to the rim, put the o-ring on the stem, and then put the nut on and make it hand-tight while continuing to press down on the back of the valve.
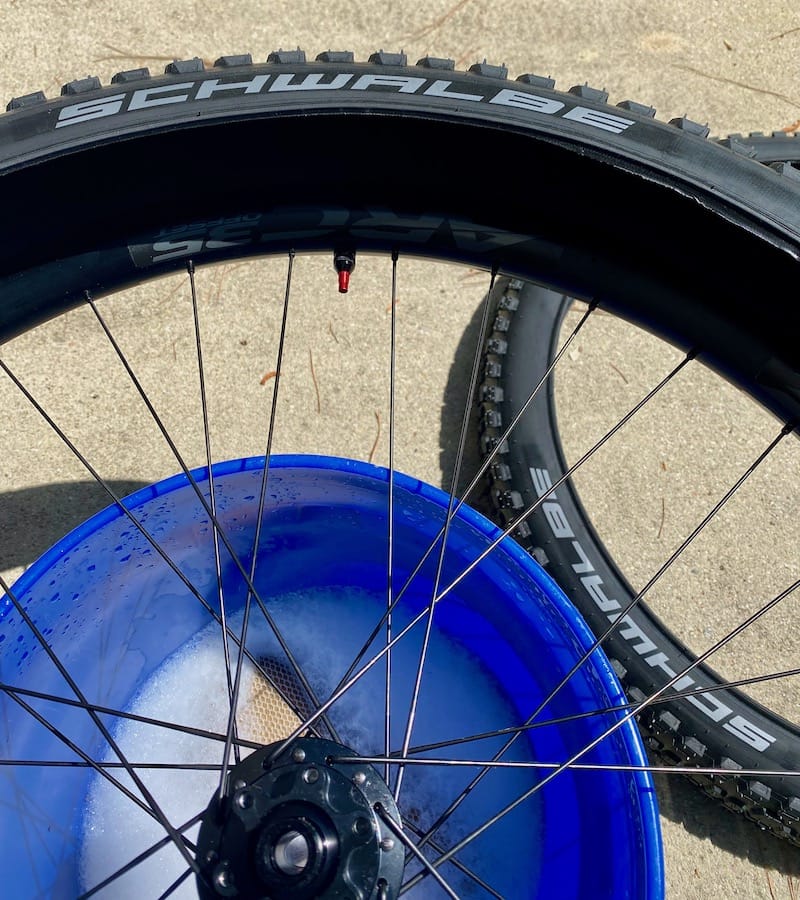
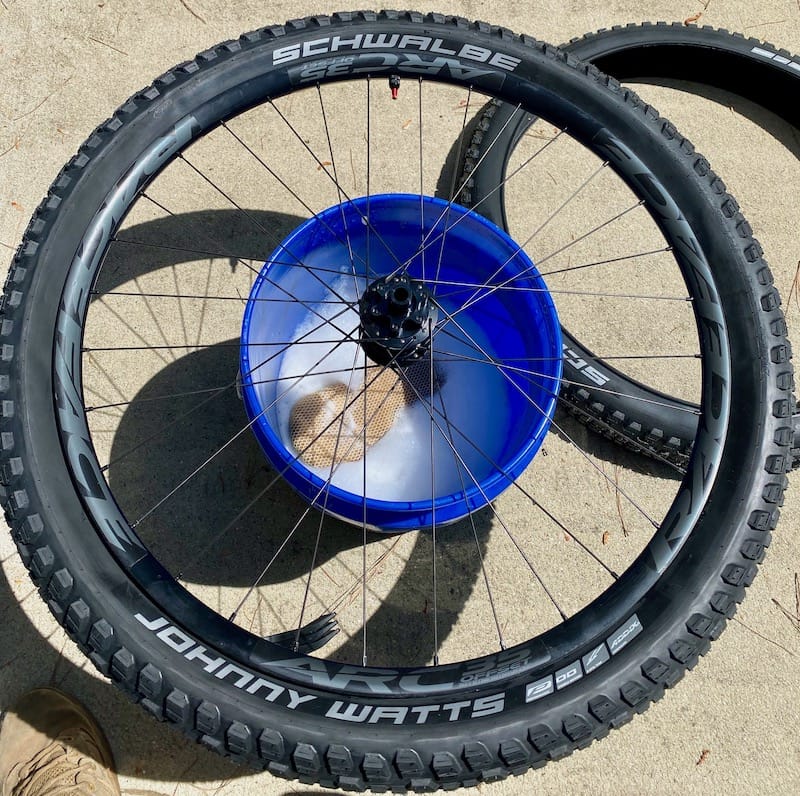
We’re now ready to mount the tires, which should be nice and warm ideally. I use the bucket as a workbench, sitting on a small chair, and this time we’ll go for ‘fancy’ - the hub logo and valve stem on my new wheels are lined up, so we’ll line up the center of the Schwalbe writing with the valve stem and hub logo. It’s easiest to more or less start in this position before both tires beads are sitting inside the rim.
IMPORTANT: Check for a rotation mark or arrow on your tires, and make sure you are installing them in the right direction!
Get one side on loosely (don’t press it to the rim edge, keep in the center), then the other. I didn’t need soap at all or levers this time, but as usual, keep pressing the tire to the center channel in the rim to get a bit more room/slack when bringing the second tire bead onto the rim.
If you’re trying to align the logos and valve stem and it’s shifted while getting the tire on the rim, if you pull both beads to the center channel on the rim, you can manage to slowly move the tire around the rim to reposition it, but better to be close to where you want it before both beads are on.
Now, before touching the sealant, we’ll seat the beads. You can push one of the beads back towards the rim, and work your way around the tire. The other side’s bead should be ok as long as it’s closer to the rim wall than the valve stem is.
Remove the valve core, and grab your compressor or charge pump - I drop my compressor output down to around 60PSI on the regulator - YMMV, but I haven’t needed more. I do a quick run of a soapy sponge around the rim/tire edges, then the beads pop right into place. At the very least you should hear/feel the second side of the tire pop/squeal onto the bead. You can use soapy water if unsure of both beads are fully sealed, or most tires have a ridge you can look at to see if it’s uniform around the rim edge. Once satisfied the beads are seated, do the other wheel as well.
Make sure to shake up your sealant thoroughly! WIth the valve core already removed, I load up my syringe - this time I’ll be going with 150ml of sealant per 2.8” tire, so in my case, a full syringe, then another half - making sure the end of the tube is through the rear of the valve stem, the pop the valve core back in, making sure to keep the tire oriented so the sealant isn’t able to coat the valve core or dump sealant out while screwing in the valve core.
Swish the sealant around the tire holding the tire horizontally (parallel to the ground) and acting like it’s a hula ho, swishing the sealant around, then flip the wheel over and do the same. Set the wheel down leaning vertically with the valve stem at the top of the wheel, then go ahead and repeat with the other wheel.
Now we can air both wheels up - I’ll wind up running these in the 20-something PSI range, but for now, I’ll pump both up to ~40PSI (don’t exceed max pressure for the tires), swish the selaant around a bit, horizontally on one side, then the other, then a few rounds with the wheel vertical, and look and listen for leaks. If you have any, swish the sealant over the leak. You can also use some more soapy water to check here.
Now it’s really just time to wait a bit - I’ll leave the tires sitting valve stem up, vertically, for a couple of hours. You could go ahead and mount the rotors and cassette (assuming they aren’t already), or really, set final pressure, throw on the bike and ride, but I prefer to give them at least a couple of hours to ensure there’s no massive pressure loss/sealant leak, clean up any minor sealant spots on the rim/tire, swish them around one more time, check and set final pressure (you did note how much pressure was in them before, right?), before putting back on the bike.
If you come back after a few hours and the tires are flat or you’ve got excessive sealant outside of the tire, spray the tire/rim down a side at a time, put some more pressure in the tire, and find the leaks - it’s possible the bead didn’t fully seal, at which point I’d remove the valve core, soap up, and blast the tire with more pressure - you may want to consider removing the sealant (a syringe can get most out with the valve stem on the 6 o’clock/downward position) before trying to re-seat the bead), or if minor, just add some pressure and position the tire so the sealant pool inside the tire is sitting over the bubbling/leak area, wait for it to stop the leak, then move on to the next, if any, until you’re not seeing any more bubbles from the soapy water and not hearing any air escaping.
And - we’re done!
In my case, I still had to throw the cassette and disc rotors on, then mounted up to the bike, checked/set final pressures (24F/28R for me for now, will air down a bit for off-road only rides), and go for at least a quick ride to make sure’s all well, before heading out on a longer ride.
We’re done!

Closing Thoughts
The first time through, it seems like a lot, but by the time you’ve done your first set, it gets a lot easier, and IMO is well worth it compared to the inevitable flats. Going tubeless won’t solve all problems like long gashes in the sidewall, but once sorted lets me spend more time riding than repairing!