Intro to wheel building
Let’s start simple - why?
Honestly, that’s a great question. If you can find a decent shop or wheel builder, many only charge $100 or so over the parts cost (although some charge more). There are some online wheelbuilder sites like Fanatic that let you select all components down to colored spoke nipples and see a visualization of your built wheels.
However, most online builders and even many locals prefer to use whichever components they choose to stock and build with, and that may not always be a match for what you’re looking for. Others may be willing to special order parts.
In my case, I wanted to use DT Swiss Hybrid hubs, which aren’t a listed option on any of the online builder sites at all, and further wanted rims with an internal width of 35-40mm, which again aren’t commonly listed options. The COVID-induced supply chain issues further made it seem even less likely to find a builder offering the components I was interested in, let alone in a timely fashion (I did have one or two offer to try to special order, but no one could guess as to delivery times).
Personally, I also prefer to work on and build my owns things whenever reasonably possible, and don’t mind investing in decent tools if I’ll use them more than a few times, so it all amounted to - why not? Along with knowing I’d wind up with exactly what I wanted.
NOTE: While most of this section will apply to all types of bike and ebike wheels, I am not a professional racer, and my focus is on mtb/eMTB wheels. If you are chasing the last gram of weight savings possible - you may want to consider having a pro wheel shop consultation. Others - read on.

What’s needed to build your own wheels?
First of all, a bit of knowledge. Wheel building isn’t an esoteric long-lost art or science, and it’s not all that complicated, especially with online spoke calculators available to do the math for you. It does, however require some basic knowledge, attention to detail, some common sense, and a few tools in addition to parts for building the wheels. I’ll try to cover each in turn - this page will cover basic information and tools, and I’ll cover component selection in a separate article.. Don’t let any of the pictures, or the spoke calculator overwhelm you - most people can do this, and you can too!
Knowledge
While there’s no substitute for experience, especially in today’s online age, there’s no reason to not try to absorb and learn from the experience of others.
There’s an online ebook that I saw highly recommended for ~$12 by Roger Musson at Wheelpro.co.uk , and he also has one of the better spoke length calculators online. I bought it, read it (more than once), and am also recommending it as it did an excellent job of covering a wide variety of wheel building topics in depth, and for only a few bucks. Oh yes, and you’ll also get free updates as newer editions are released. Realistically, if you’re looking at $500+ in most cases to build a set of quality wheels - it’s worth the few $ investment to help you to do it right.
There are also numerous online videos on wheel builds - these aren’t going to give you everything you need to know, but watching a few will help reinforce the general process and remove some of the ‘mystery’ from building wheels.
It’s worthwhile doing some online research and searching...
As you’re deciding on components, it’s worth doing some searching for reviews and feedback from others who have already built with or used those components. For example (and don’t worry if these don’t make sense to you - yet):
Should you use a 3 pawl rear hub on an e-bike?
Is the published ERD for a specific wheel accurate?
If using DT Swiss Pro Head spoke nipples on a non-DT Swiss rim, should you use PHR washers?
Roger’s book covers most of these, while a few online searches will cover the rest. The answers to the above, just for grins, is in order:
1. Not in most cases and certainly not on cheaper hubs, as e-bikes tend to be brutal to rear hub pawls (along with cassettes and drivetrain).
2. Maybe yes, maybe no, but you should always measure yourself, preferably with the spoke nipples (and washers, if using) you intend to build the wheel with. You can order all parts EXCEPT for the spokes, and then measure and order the spokes separately - or roll the dice and see if you wind up lucky..or sad.
3. Usually no, but it depends - DT Swiss PHR washers are curved and match the profile of DT Swiss rims. If your rim profile on the inside of the spoke bed is similar, you may be able to use them - but usually not.
Attention to Detail and Common Sense
These go hand in hand. Attention to detail if often used in military circles, as ‘simple’ mistakes can easily lead to someone getting hurt, or worse, and the same apples here. Pay attention, go slow, and stop if you’re unsure things are right until you can confirm. Re-lacing a wheel after mixing up drive side(DS) and non-drive-side(NDS) or front and rear spokes of different lengths doesn’t take much time, and wheels are worth building properly.
Hopefully common sense doesn’t need much explanation, If something doesn’t seem right, stop. If many people online who appear to be credible saying a specific component isn’t good - it probably isn’t.
Tools
The bare minimum is a good spoke wrench, a wooden skewer, a nipple driver or flathead screwdriver depending on spoke nipple type chosen, some type of lube, some zip-ties, a pair of spokes, a spoke ruler, and ideally, a set of calipers.
You’ve probably heard of and maybe even looked at wheel truing stands, dishing tools, and others. They can retainer make life easier, but a zip tie tied to a chainstay, seatstay, or front fork can suffice. It may not be quite as precise as a super-expensive DT Swiss machine with numerous indicator gauges, but in reality, you just don’t need to get into thousandths of an inch levels of accuracy - within 1mm or so is great.
We’ll cover each tool in turn, with a few options where applicable.
Note: As someone who has been building all kinds of things since being a kid, I tend to look towards the ‘buy’ once range for tools. I’m not thrilled in some cases on the prices, but for many of the smaller tools, it’s generally worth a few dollar more for a tool from Park Tools, or at least BikeHand, who has some cloned tools, is undoubtedly a China brand, but is of generally decent quality.
Spoke Wrench and Nipple Driver
Spoke wrenches are used to tighten and loosen spokes. Having both the proper tension as well as even tension across the drive-side and non-drive-side spokes is what keeps the wheel durable as well as centered.
Mostly likely we’ve all seen or owned one of the ‘universal’ round ones with different width slots cut into it. They’re cheap, only cost a few dollars, but they’re not the best tool for the job. Ok to have in the emergency kit, but don’t use it to build your wheels with.
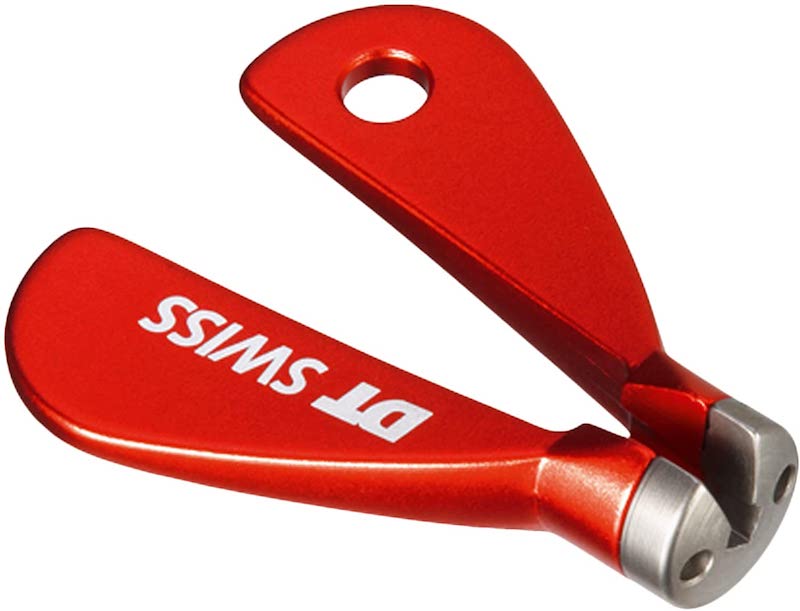
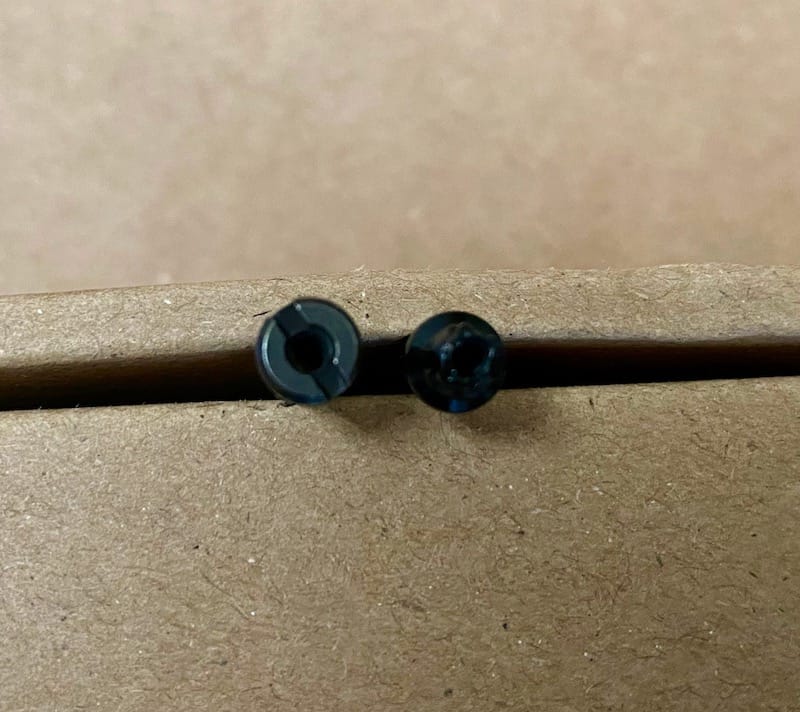
Spoke nipples (the part the spokes thread into at the rim) are nearly always one of either 3.23mm, 3.30mm, or 3.45mm. All DT Swiss (and may others) spoke nipples will use a 3.23mm spoke wrench like the excellent DT Swiss Spoke Key. There are a few other decent options out there - what you’re looking for is one that is ‘3 1/2 sided’ - looking at the cutouts in the DT Swiss Spokey, you can see it has four flats in it, with the fourth one being slotted to slide over the spoke. This gives the most solid engagement on the relatively soft spoke nipples and is much less likely to round off a nipple when truing (making the wheel round and without lateral/side-to-side wobble) a wheel. Unior and Cyclus also make good quality spoke wrenches, along with Park Tool.
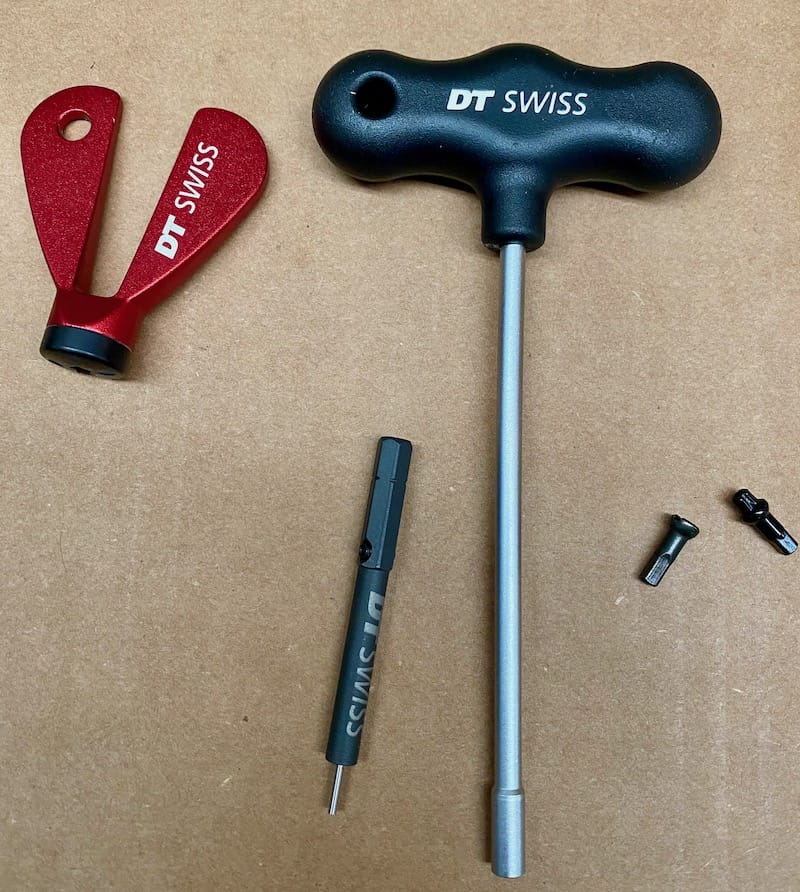
Now, when initially building the wheel, you have the advantage of the wheel being off of the bike, as well as there being no rim or tubeless tape or tire in the way. The backside of the spoke nipples (‘inside’ the rim bed) can also be used for initial tightening and truing, and can be both quicker as well as less likely to round off while building, so we’ll want to use a ‘nipple driver’ to let us drive/install/tighten the spokes while building, for all but final tentioning and truing. Most spoke nipples have a flat cut into the nipple head which can use a flathead screwdriver in a pinch, or a nipple driver, with the nipple driver being a bit faster and more efficient.
Beware there are some different types of drivers, as some spoke nipples such as DT Swiss Squorx(uses a Torx head) or Sapim Double Square (square drive) don’t use the standard nipple driver, but do have their own advantages such as more leverage/less likely to slip when using a driver for your build.

You can also buy nipple drivers that can be used with an electric screwdriver, and allow the center pin depth to be adjusted. Adjusting the pin depth allows you to set one depth, for example to where the spoke threads just become hidden/fully enclosed by the spoke nipple, allowing you to quickly get all spokes to the same point before final rounds of truing. You don’t need one of these, and do need to be careful if using one, especially in a drill/power driver - they’re intended for initial rough assembly, not final (or over) tensioning and truing.
I’d recommend making the investment for at least a quality spoke wrench and nipple driver.
Spoke ruler, measuring spokes and calipers
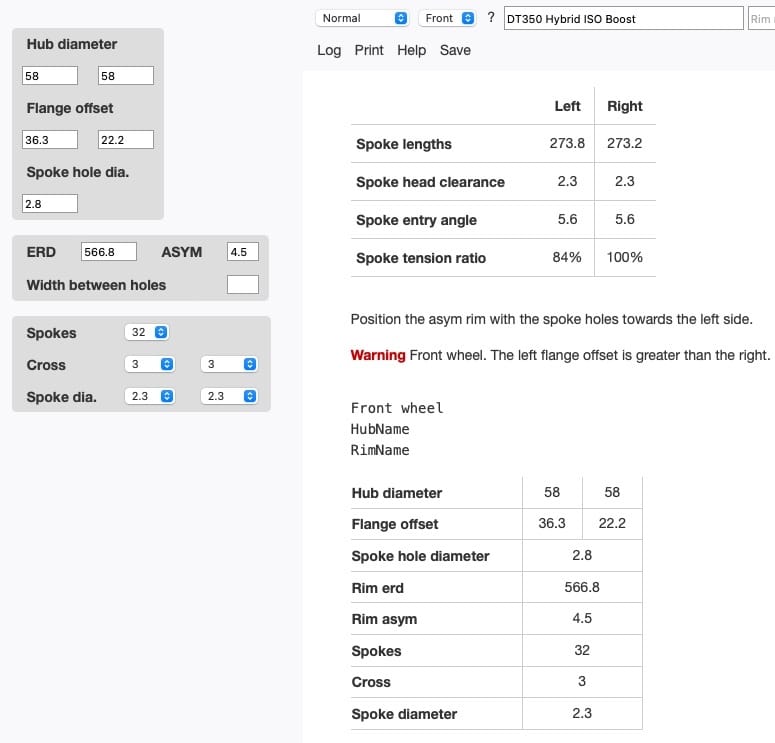
One of the truly critical steps in building a wheel is in properly measuring the ‘ERD’ (Effective Rim Diameter) of your rims. This measurement, along with proper flange and offset distances for your specific hubs (don’t worry too much about these right now), are the most important measurements to get right and are required to plug into a spoke length calculator. While rim manufacturers typically do publish the ERD, and some calculators have databases - they aren’t always right, the values can change depending on your choice of spoke nipples (and/or use of spoke washers) and can lead to purchasing the wrong length spokes. While there is a couple of mm of leeway in most cases on spoke length, it isn’t very much, and too-short spokes either can’t be laced up at all or will be weak, having lesser spoke nipple thread engagement, while spokes that are too long will run out of thread and be under-tensioned as a result.
So unless you can be 100% positive on the ERD measurement (e.g. buying rims from a local shop that has built many wheelsets and will accept a return if it’s wrong..), you’ll want to forego buying spokes until last, and after you’re able to measure for yourself, which we’ll cover in some depth later.
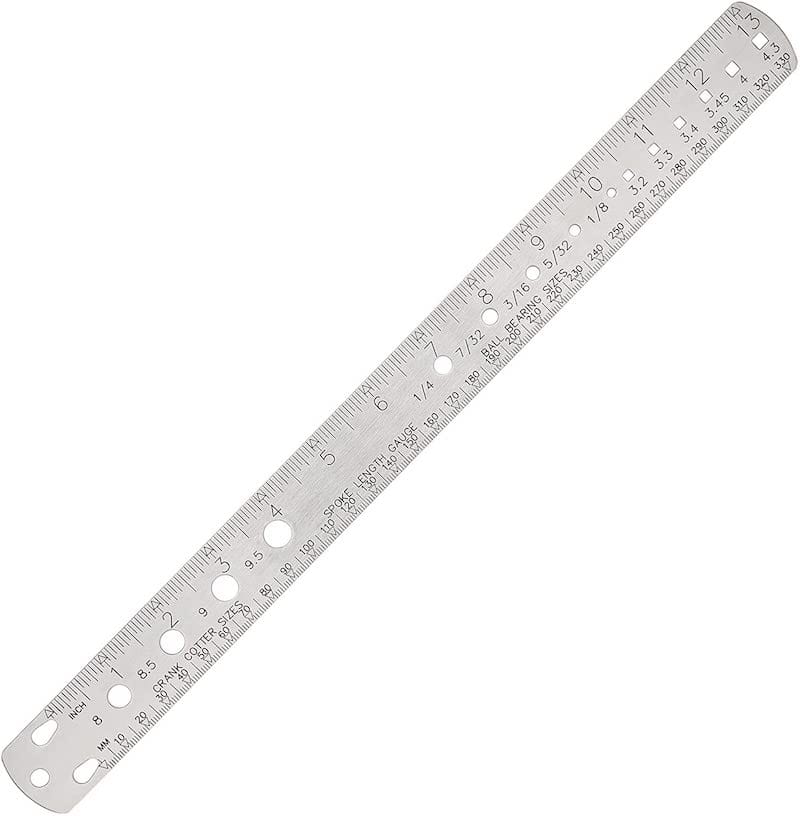
For now, I’ll say you will need either a spoke ruler at minimum if building a set of ‘straight-pullspoked wheels, a set of calipers (inexpensive Harbor Freight ones will do, although Mitutoyos are quite nice..) if using J-bend spokes, or both - a spoke ruler is ~$10, and can be helpful in the event you have an existing wheel break spokes and to confirm the spokes you ordered are in fact the length you chose. I’ll go into more detail on J-bend vs straight-pull spokes and hubs in the Components section.
So what the heck is a ‘measuring spoke’?
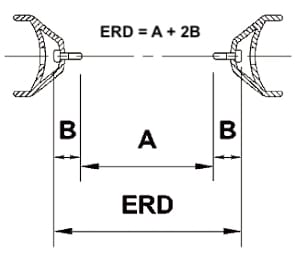
ERD is the measurement from the very end of the spoke inside the nipple to the end of the spoke inside the nipple opposite it. It is not the inside diameter of the rim, nor even the measurement to the ‘rim bed’ inside the wheel, as it takes into account the length of spoke washers, if used, as well as the specific nipple types used and exactly where the spokes end inside the nipples.
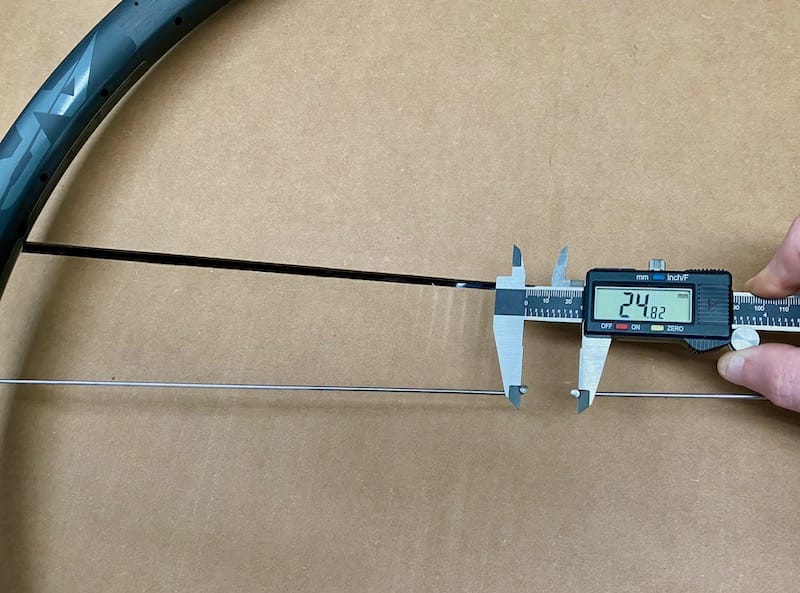
There are various ways to measure this, including no doubt some rather expensive ‘professional’ tools, but you can do it yourself easily with a pair of spokes and a pair of calipers. What you’ll want is a pair of spokes a bit less than half the wheel diameter - this isn’t an exact measurement, but you want to have some amount of gap between the pair of spokes at the center of the rim so you can measure and add them up properly. You can see below the calculation shown for ERD is A + 2B, but what we’re really measuring is the distance from the end of spoke 1 inside the nipple to it’s end, the distance from the end of spoke 2 opposite spoke 1 inside the nipple to it’s end, and whatever distance remains - measured by the caliper, and adding those numbers together. Life can be made a bit easier by using two spokes of the same length with nice even spoke lengths - for example, most 27.5”/650B wheels have a claimed approximate ERD of ~560mm +/- a few mm, so a pair of 250, 270, or 275mm spokes will make for a good set of measuring sp without overlapping or having a huge gap in the center for measurement, and add up easily and quickly when determining final ERD values.
Note that most, but not all, MTB and similar spokes are 14g or 2mm at the threaded end, and require 2mm spoke nipples. There are some other variants out there such as 13g spokes, but a pair of appropriate length spokes, along with the nipples (and washers if using) you’ll be building your wheels with, is what you’ll need for measuring ERD so you can get your ‘real’ spoke length calculated and ordered. Don’t worry about spoke type here much - just order some straight guge non-butted spokes for measurements, although it’s worth checking their length with a spoke ruler once received ‘just to be sure’ for your later ERD calculation.
One tip is if you plan on building your wheels using black spokes, order the ‘measuring spokes’ in silver, or vice versa. You can go ahead and order all of your nipples at the same time as you order your hubs, rims and other parts or tools; everything but your full set of spokes.

Lubes, spoke prep, loctite, ...
There are numerous trains of thought on this one, and more than a few heated debates out there.
The general intent is that when building wheels and doing initial spoke lacing, truing and tensioning, you want the spoke threads and nipple to thread and unthread/turn easily, while once the wheels are trued, tensioned and mounted, don’t loosen on the road.
In the past and still today, some use linseed oil, others use specially formulated spoke prep which dries to a loc-tite like substance, some actually use (blue or purple) Loc-tite, anti-seize, oil or grease, while many spoke nipple manufacturers have options for ‘built-in’ locking mechanisms - DT Swiss has options for nipples pre-treated with a locking compound, and Sapim has a ‘mechanically’ locking nipple using slightly deformed threads, in addition to ‘untreated’ nipples in Aluminum or Brass.
Many longer-time wheel builders will say that a properly built, properly tensioned wheelset - simply needs no additional ‘locking’ at all. The reality is wheels don’t truly stay the same shape as they are ridden, as both the rims and spokes will undergo expansion and contraction at different points, but for many builders - locking compounds or mecahnisms are simply not needed.
Others will say that they have been using <something>, whether it’s linseed oil or purpose-marketed spoke prep/lock, and they’ve never seen issues, so they continue to use it.
You will have to ultimately make your own call here. Note that aluminum nipples in particular can benefit from at least the use of oil, especially if not anodized, as well as carbon rims with aluminum spoke nipples should at the least have some lube light grease at their mating surface.
I use a small dab of grease - park tool or slickoleum are fine, or even a bit of Tri-oil as a backup, on both spoke threads and the nipple/rim intrface while assembling, with no locking compound added or build into the spoke nipples. YMMV, but I’ll keep on this path unless I see a reason to change.
Wheel Truing Stands
As mentioned previously, you could indeed built a wheel without a trueing stand at all, using a zip tie on your bike’s chainstay and fork, cut to a specific length on each side in order to be able to detect out of round as well as lateral side-to-side movement. Some people do this quite successfully, and it can be done. If you have a repair stand, some manufacturers like Park Tool offer relatively low cost attachments which are also workable, but typically can only cehck one side of the wheel. This isn’t a problem in operation, as you can flip the wheel around to the other side, while truing stands that have guides or dials on both sides are more expensive but can reduce building time.
Of course, you can also spend hundreds, or even thousands of dollars on professional-quality truing stands. The Park Tool TS2.2P (the ‘P’ is powdercoated and slightly cheaper than the chrome TS2.2 but otherwise identical) is the ‘base pro model’ for ~$300-400US, while the Park Tool TS8 is the ‘home mechanic’ version, but it isn’t much cheaper at ~$200, only does one side at a time, and is certainly a lesser design, so YMMV. Note - it seems Park has renamed their stands recently (changing naming to start with 4, e.g. 4.2 now) but they’re still the same basic units in ‘casual,’ ‘industry’ and ‘pro’ variants. I’d still go with the one step down from ‘pro’ today.
Bikehand and one or two others make a TS2.2 clone for ~$200, which has somewhat mixed reviews - some people love it, others say it’s unable to be centered properly. I have some Bikehand tools and in general they’ve been fine, but YMMV. If you aren’t sure you’ll be building more than one wheelset, unless you really like tools - I’d go as cheap as possible but not like a $50 stand as wheels are pretty important in keeping you rolling - and safe. If you expect to do multiple wheelsets, well - go with the Park Tool version, IMO.
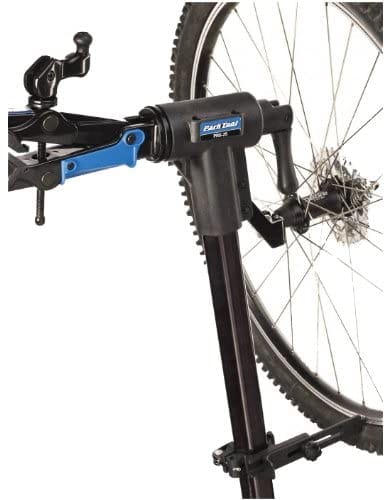
If you have a Park Tool repair stand, you can also get an add-on attachment for it, fairly, cheaply, like $40., shown at the right. I have one and it’s usable, but a bit more fiddly IMO and takes longer to build wheels with versus the standalone.
But wait, there’s more...
Truing stand manufacturers are getting greedy, and love to have ‘add-ons,’ some of which really should come with the stand, especially the higher priced ones.
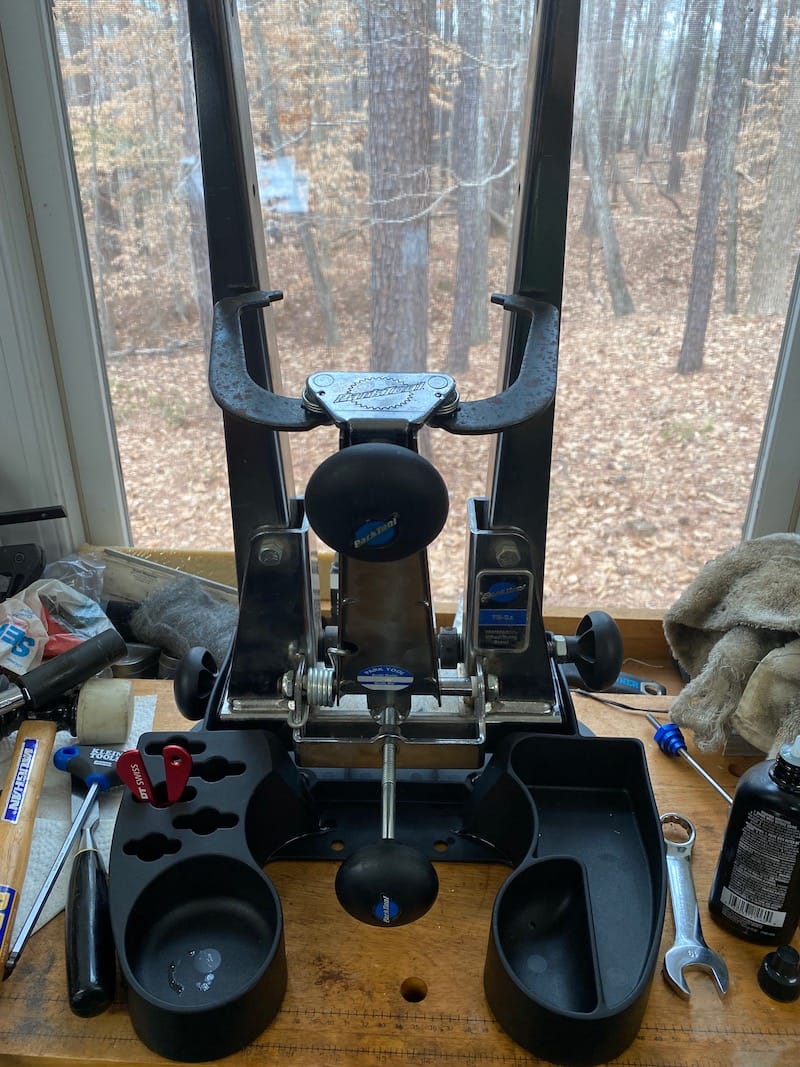
A centering gauge may be needed to ensure your stand caliper arms are perfectly aligned and centered (for dual-arm stands like the TS2.2 or TS2.2P). While Park Tool and others officially claim their truing stands are aligned from the factory, well - this may or may not be true. If it’s not, and the caliper arms are favoring one side over the other, you can wind up with an incorrectly dished wheel; that is, one that has the rim out of center, favoring one side of the hub or the other depending on alignment.
Considering the price if the alignment tools, I got a bit creative and did not purchase the tool. I originally thought I would build my own centering tool from some PVC or an adjustable small T-square, but instead I used a solid flat edge on the inside of the truing stand arms, in different positions, to adjust the centering on the stand. I then also checked it with a known good dished wheel, and I’m going to call it good, as I’m quite sure I’m within 1mm of centered at this point. You can see in the picture to the right of my TS2.2 both that it has a stand, as well as the caliper relative alighment to the stand arms.
Yeah, that’s right - you may also need to buy a stand. While it’s well worth it for ~$50, it’s quite frustrating it’s not included in the purchase along with the alignment gauge. You don’t need to buy one, though - you can use a set of clamps or vice, but you will want to keep your stand stable when truing wheels.
Stand maintenance is basic - just keep it clean, and oil or grease the threads and pivot points and check alignment occasionally, although once aligned, it generally shouldn’t go out of alignment unless something gets bent somehow.
A few more odds and ends
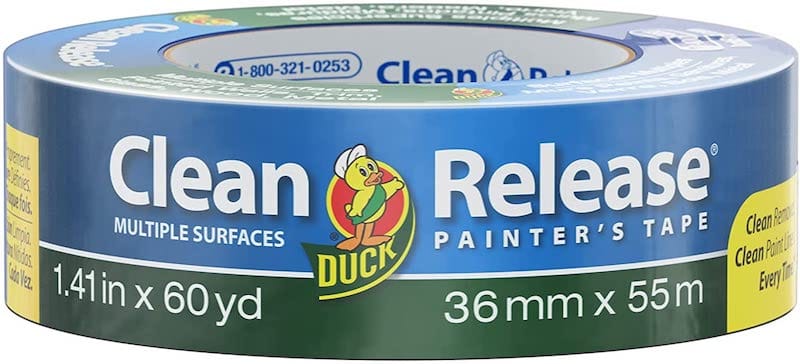
Get yourself some ‘painters tape.’ You’ll want to use this to at the very least ‘flag’ your first spoke placed, and also for measuring twist in final tensioning of the wheel. Don’t worry too much on the tape width - anything from 1/2” to 1 1/2” is fine.
Depending on the truing stand to be used and what accessories, if any, you may need an adapter to mount your wheels. For thru-axle wheels, you can find inexpensive multi-size hub adapters on eBay, Amazon and AliExpress. I think I paid $20 or so for mine, covering 12mm, 15mm, and 20mm, with my bikes using 15mm front and 12mm rear.
Hub adapter for mounting different wheel types to the stand

Could there be anything ELSE?
Yeah, but thankfully not much. You can buy a dishing tool if you’d like, which is used to compare one side of the wheel (rim to hub distance) to the other, to ensure the hub and rim are centered properly. If you have a dual-arm truing stand which is centered properly, it shouldn’t be needed. I bought one and used it a couple of times as a sanity check, but IMO it’s not really needed with a properly adjusted and centered stand.
You can use a wooden kebab skewer when placing spoke nipples in through the rim to get them started on the spoke threads, or you can buy something like the EVT Multifinger tool.
You could spend $ on a ‘spoke nipple box’ which lets you dump spoke nipples into the box, oil them, and shake them, and all spoke nipple heads will be sitting in the same upright orientation - neat, but not needed IMO.
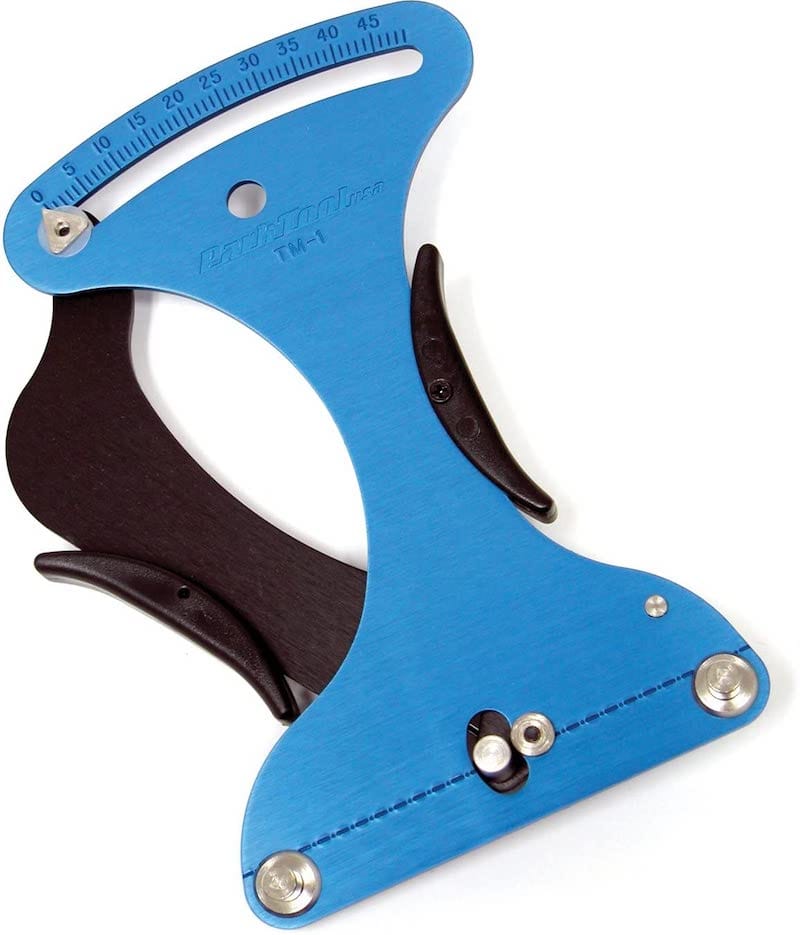
One tool that probably is worth considering, although over time you may no longer use, is a spoke tensiometer. It’s sad to say this $90 Park Tool model is among the cheaper ones. When you build wheels, each rim has a maximum tension range, usually along the lines of 100-12KgF - this is the target tension for the drive side wheel, with the opposite side usually being less but what’s needed to keep the wheel trued. Some people can ‘pluck’ the spokes like a guitar string and go by sound, but for first wheel builds, it’s probably worth the investment or seeing if you can borrow one.
Is THAT it?
I have no doubt I’m missing something, as there are always new unique products intended to separate us from our money, but I can’t think of any others truly worth noting.
It is possible to ‘start cheap’ with perhaps $100 into tools or less, which is about what you’d pay someone reasonable to build a set of wheels for you. It’s also possible to spend - more. You can occasionally find deals on used equipment at estate sales, eBay, even Amazon Warehouse deals, Facebook Marketplace or Craigslist if you’re willing to wait long enough or get lucky on timing, although during the pandemic, tools as well as components have been in short supply. I was able to pick up a used TS2.2 stand on eBay for a pretty decent discount, while it seems retail prices are rising, so - YMMV. Only you can decide if building your own wheels is for you or not, but if you decide to go for it, see the other sections on component selection and builds, and of course - good luck!
Note: I did some quick updates in 2026 here, including checking prices and seeing if better alternatives are out there. First, yeah, prices keep going up, and that sucks - for all of us. However, buying new ‘nice’ wheels also has gone up. You don’t need ‘the best of the best’ for each and every tool, and it’s possible to find a balance. to bring costs down a bit. Personally, I’d try not to skimp on the truing stand, spoke wrenches, and the rims and spokes themselves - anything else is fair game if you need to try to reduce costs for your first build.
Still interested? We’ll dig into components next...