3D Printing Miscellanous Nice to Haves
As you start to graduate from simple prints to more complex ones, there are some semi-standard things that will make your printing more productive and less delayed.
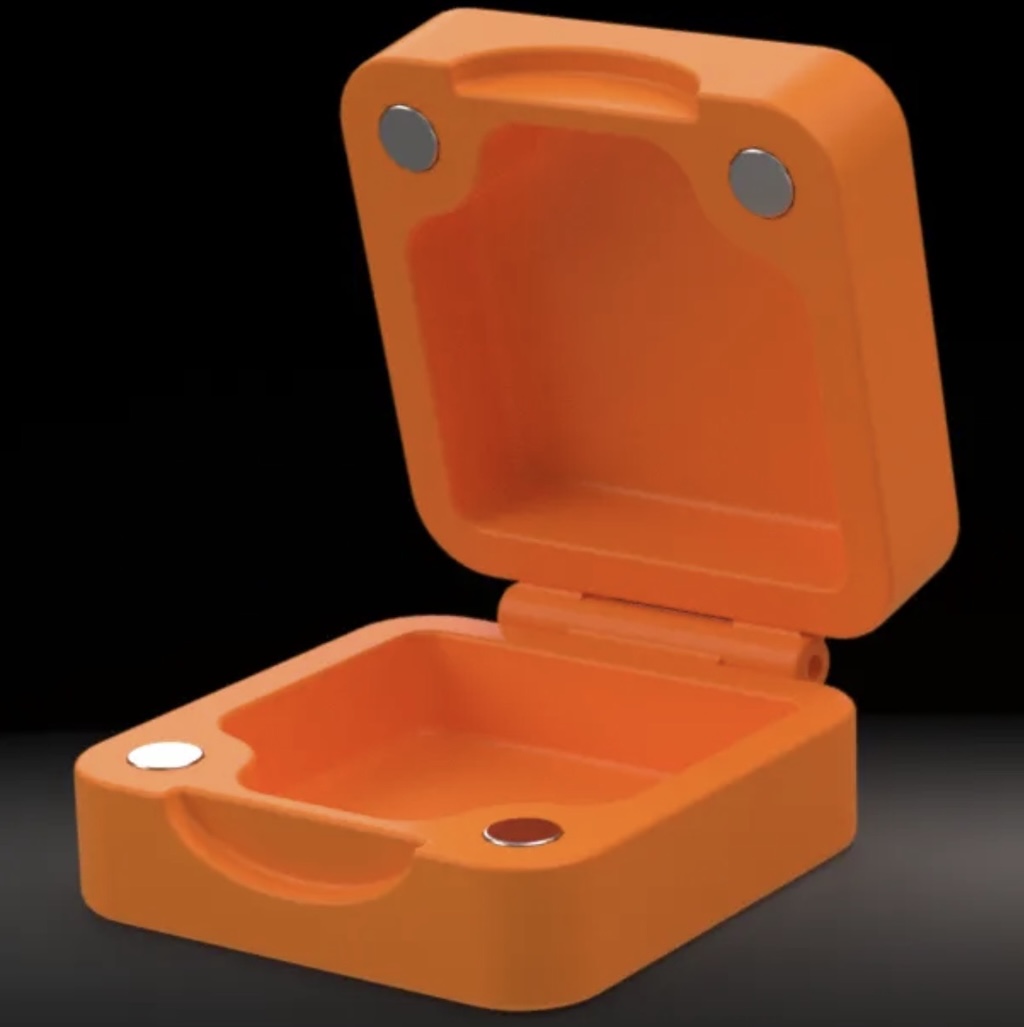
A lot of more complex (and even simple) 3D printing projects use magnets for part of their assembly or use.
What else do I need?
Realistically, it’s going to depend on your specific projects, but there are also some ‘basics’ once you have drying and storage of filaments covered.
There are a few basic add-ons which I consider useful for almost everyone.
-
Dessicant for filament storage
-
Dessicant holders with hygrometer
There are various dessicants out there including color-changing which seems cool and all, but can contain toxic ingredints like Cobalt chloride or Methyl Violet. Additionally, safer options are available that also outperform the typical color-changing dessicant like the Alumina Dessicant - noting that is as well can be ‘re-charged.’
Initially I had picked up some cloth bags to hold the dessicant with the spools for storage, but I’m either using a PolyDryer storage bin, or vac-sealing, and these printed spool insert dessicant holders with optional hygrometer lids are just awesome.
Do note there are two different container heights - in general, the short one is for the hygrometer lids which are taller, and the longer ones are for the non-hygrometer lids. Absolutely print a single container and lid or two lids to check fitment before going all-out on these, but I’ve got over 10 or so, and the hygrometers are pretty inexpensive, around 4 for $10. As my PolyDryer boxes have their own built-in hygrometers, I use these for any filament going into a vacuum bag.
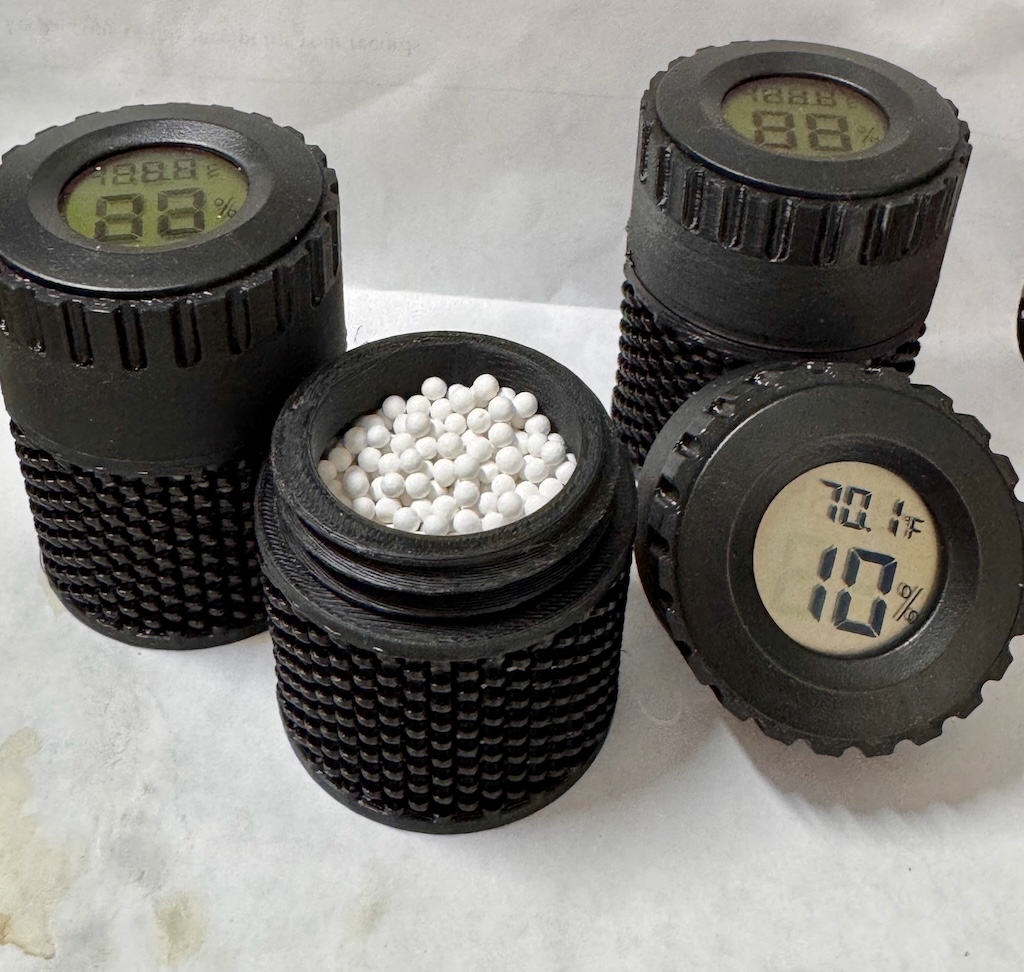
Dessicant Spool Inserts with hygrometer inserts are a great early printing project.
Butane Torch - why?
So while there are lots of calibrations and fine-tuning, you’re going to occasionally wind up with a print, or a part of a print that exhibits stringing - like small fibers or spider webs on some areas of the print.
You can see this evident on the temperature tower to the right, the strands around the 230* and 235* area, and it cen be a lot worse.
Butane torches are pretty inexpensive, last quite a while on a single refill and can be used to very quickly make the stringing disappear and even smooth out not-so-perfect print surfaces. And of course, you can alkso use it for the kitchn, e.g. making Creme Brulee if you’d like. I can tell you after doing some PETG larger prints - it would’ve gotten expensive to reprint versus the small cleanup with the torch on a couple of pieces.
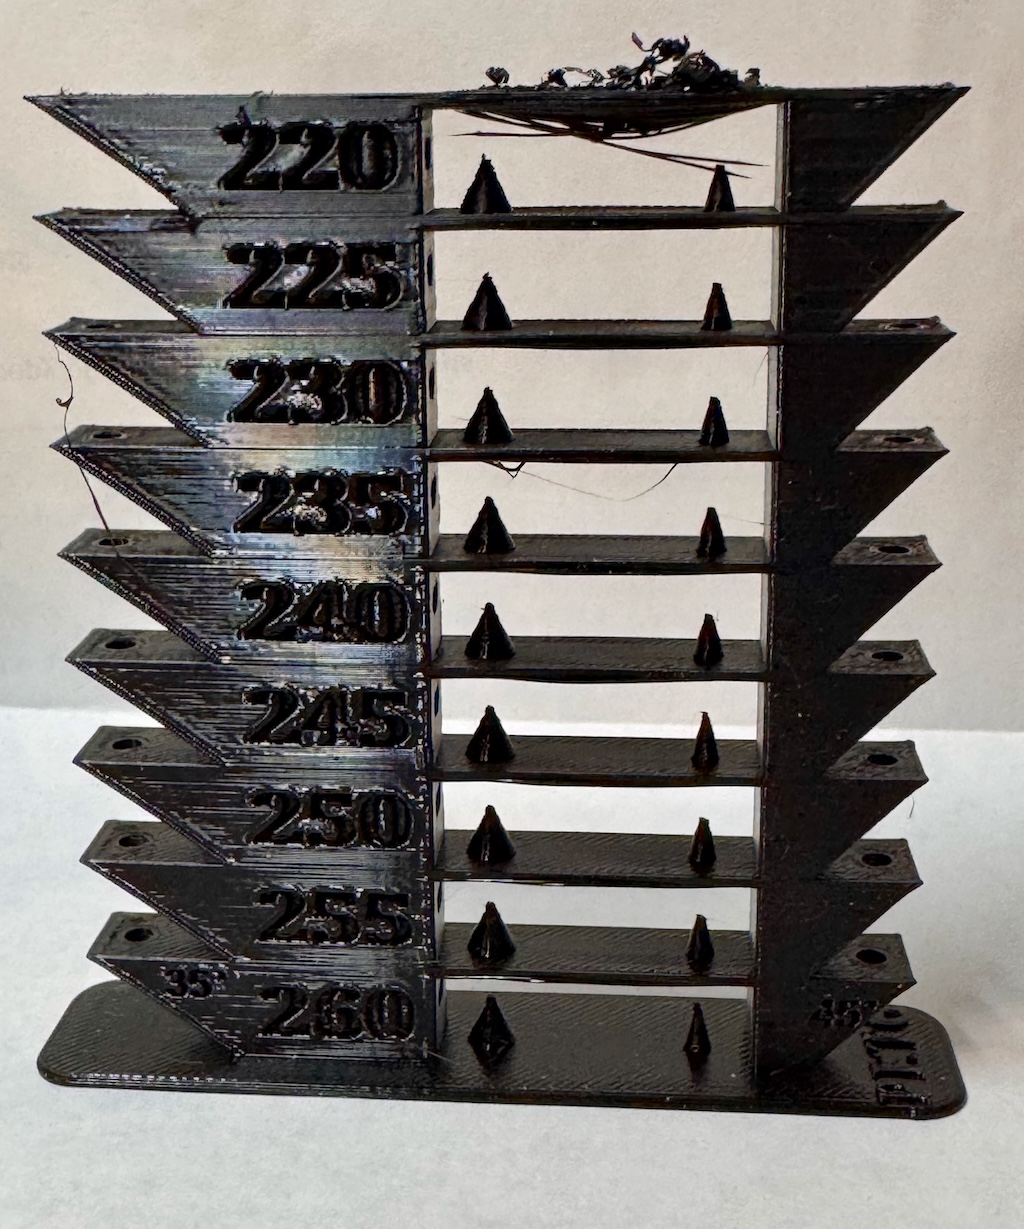
Note the stringing around the 230* and 235* levels of this temperature calibration tower. (The top of the tower isn’t really stringing, it’s the collapse of bridging))
Magnets
Especially once you start getting into ‘functional’ prints - that is, things that are more than decorative, might open and close or have other movement and are intended to be a bit more durable usually - you start to expand not only in your filaments (moving into PETG, but also possibly ASA, PC-CF and others depending on the purpose), but also in the ‘extra pieces needed’ to complete some of your builds.
Magnets are inexpensive and used a LOT in functional prints
The good news is they’re pretty inexpensive. However, they come in MANY different sizes, and there is no real standard. Both circular and rectangular magnets are popular, with many projects needing 2-8 of them, although some may require many more. We can say that many of them tend to be 2 or 3mm in thickness, and for many of the circular ones, 6mm and 10mm diameter are pretty popular.
For rectangluar magnets, 20mm in length is fairly typical, but in differing widths - I’ve got projects using 6x20x2mm, 10x20x2mm, and a few other variants.
The ‘cleanest’ path is easier once you’re building all of your own models in CAD as you’ll naturally gravitate towards standardizing as is possible, but we’re at the mercy of other creators until then, so getting a couple of multi-packs to start with is probably the right path to get started. You can possibly save a couple of dollars messing around on AliExpress but expect a couple of weeks for shipping in many cases.
Or we can pick up a reasonable set to start, covering both round and rectangular:
The first two (the round ones) are pretty good and you’ll wind up using most or all of them over time. I don’t entirely love the rectangular set as a few are IMO unlikely to get used, but otherwise the options are to buy a bunch of individual single size packages for many sizes, which costs more and is more wasteful. Note you can cut down magnets if need be, e.g. trim a 25mm long magnet down to 2x 10mm and a 5mm or similar, so it’s not too bad as long as the thickness is right.
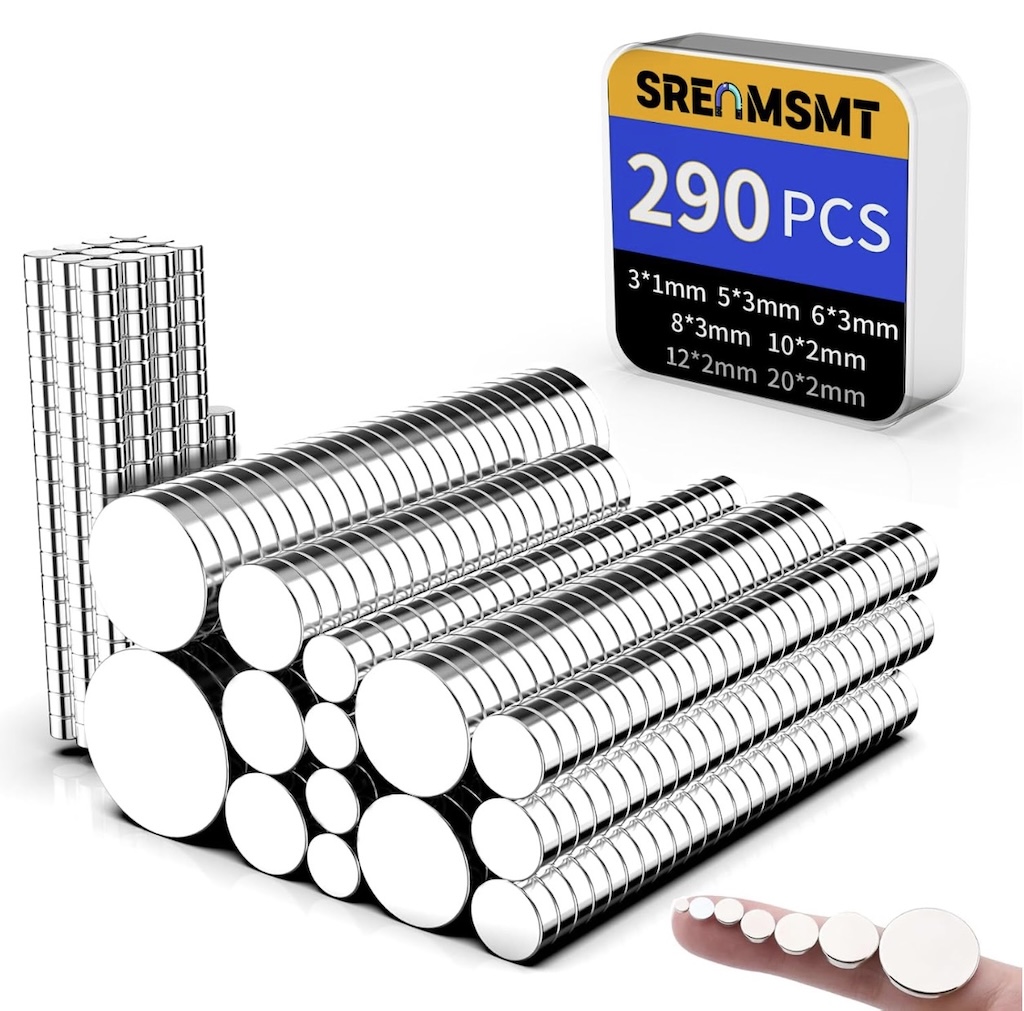
Having an assortment of round magnets on hand will help as you discover new uses and projects for your 3D printer
Screws, nuts and washers
The three of these really go hand in hand. As most engineering and engineering/CAD systems along with scientific instruments and the like default to the metric system, nearly all models and projects you come across will be using metric parts, with notations like M2, M3, and the like, e.g. M5x25 is an M5 size (5mm diameter thread) screw with a 25mm threaded length. You may also see pitch variants, but in most cases, you’ll be supplying both the screw and the nut or insert it threads into, so that’s usually not that important as to thread pitch specifications unless specifically called out in the model you’re working on.
There are different types of screw heads - button or pan head, which are a bit rounded, or socket head, which is a bit thicker/less flush. There are other types but these two are the most commonly used/asked for in many 3D printing projects. Note as long as the thread pitch is the same, you often can choose which one to use. Buttonheads are more often to use phillips or flathead, while socket heads most often use allen keys or torx drivers to screw/unscrew them. For some projects, I don’t care at all - it’s whichever I have in front of me, while for others, I may be looking for more of a flush look/fit (buttonhead), so having both on hand us helpful.
A pretty good number of projects will use somewhere between M2(2mm diameter threaded portion) through around M6(6mm threaded portion). Of course, doing enormous multi-part cosplay costumes - all bets are off, but for most other things, having a range of M2-M6 in various lengths is a great starting point.
All of these assortments will inevitably pump up the ’number of pieces count’ with washers (flat and lock/split-ring) as well as nuts. It’s ok - you can always re-use the organizing container they come in and just buy the indvidual packs you use the most to fill back in with in the future.
The picture on the right shows apretty typical assortment of M2-M6 screws, washers, and nuts with the screws in different lengths. There are a lot of assortments with only M2-M5 in them, which are ok, but then inevitably you come across a project needing M6 screws, so this is an ok compromise pack IMO.
Note these are all socket head allen screws, and are in black zinc. I use more black than other types like stainless in my projects, but stainless options are also available.
For now, I’d consider your initial print plans, and pick up at least one.
A quick note on hardware ‘grades'
You’ll sometimes see the various assortments call out, or sometimes, worse, entirely ignore ‘grades’ like Grade 8.8, 9.8, 10.9, 12.9 etc.
In short, the higher the grade, the stronger the screw - which is usually a direct correlation to the material the screw or other parts are made of.
For general purpose usage, I tend to look for at least grade 8.8, or ideally 9.8 or higher whenever possible, as you’re likely going to wind up using your screws across different projects, some of which might see more pressure and tightness/torque than others.
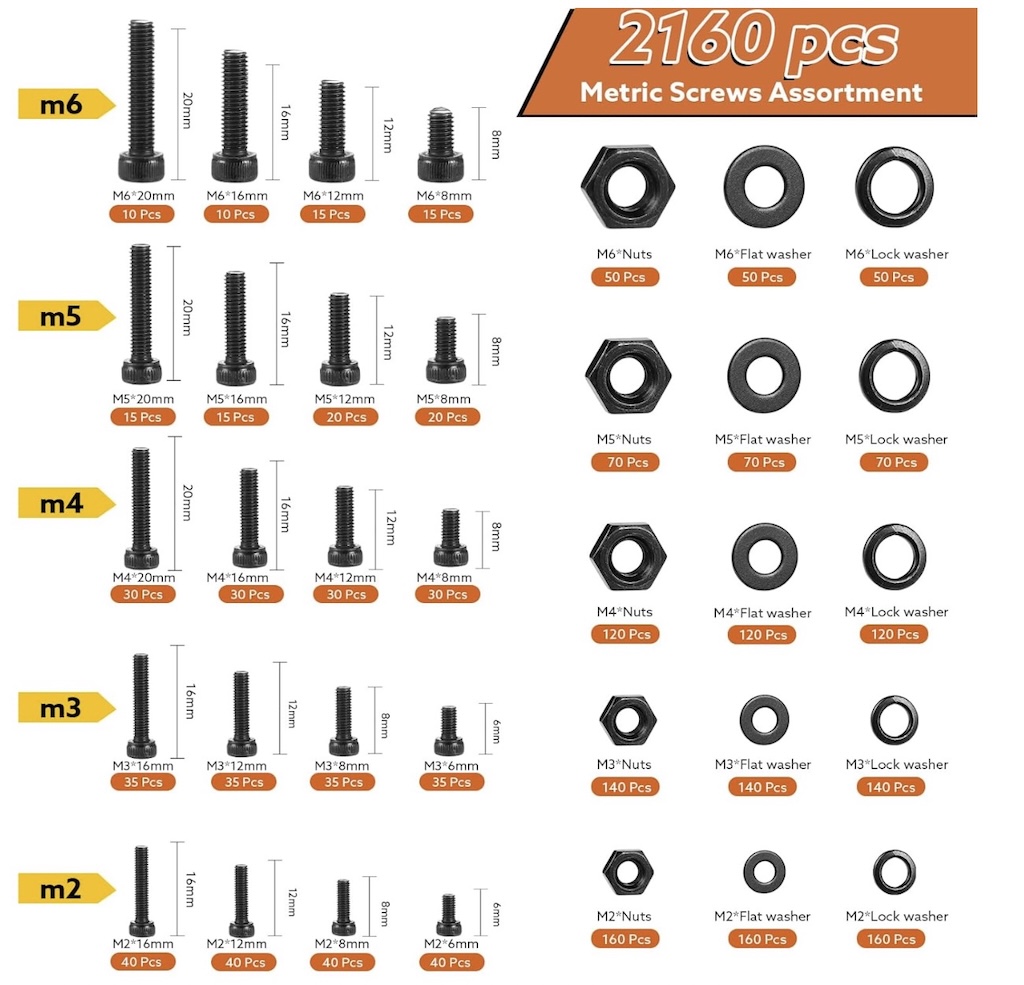
A fairly typical assortment of metric screws, nuts and washers
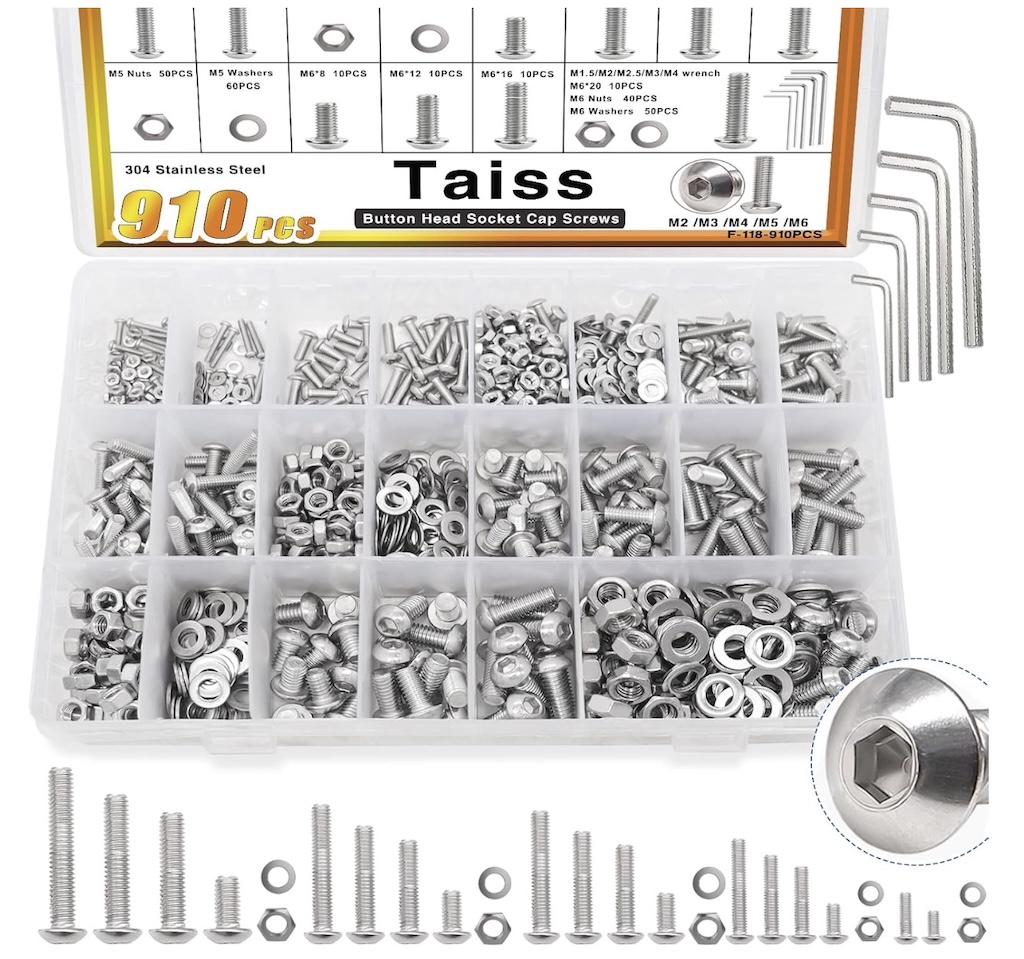
A fairly typical assortment of metric screws, nuts and washers - in stainless
Threaded Inserts
We’re almost in the home stretch now. Some models will allow for you to hold a nut on the backside to screw it together, but often they will ask for a ’threaded insert.’ These can be pressed or tapped into the printed parts, sometimes wanting mild heat (a hair dryer will suffice in most cases) or simply tapped in place with a small hammer, to then allow you to screw it together. The ‘most correct’ way is to use something like a heat-insert capable soldering iron like this one.
Again, the ideal set includes M2 through M6, so I’ve given an example to a decent set as well as a link to them here.
Just like with the screws nuts and washers, you can always ‘backfill’ the same orgniazer ifyou find yourself running low on a particular size.
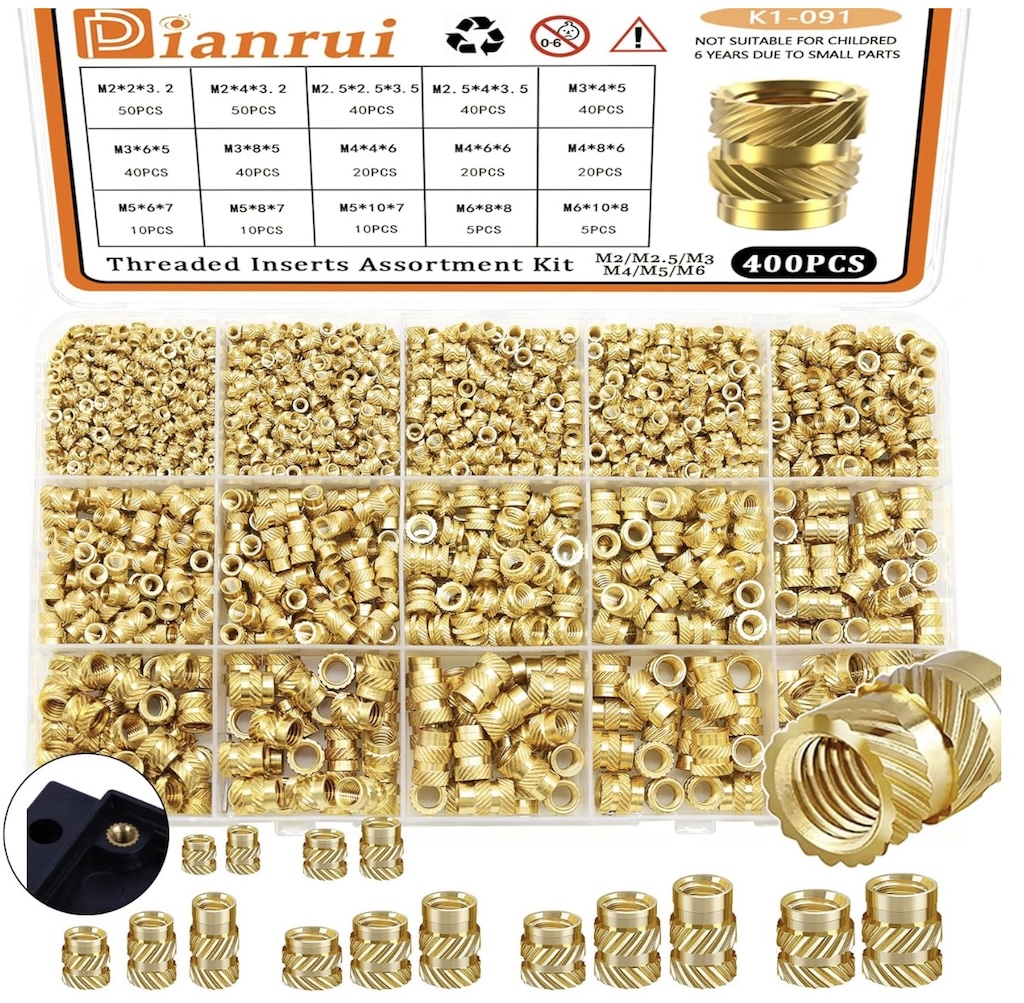
A threaded insert assortment covering M2-M6 sizes
Other Miscellaneous
There’s not too much, really, unelss you get into painting things., but here’s a small list of things you might consider:
-
sandpaper and sanding block to smooth out rough parts or seams on occasion. Always start with higher grit until you see how quickly it will remove material!
-
Spray bottles for alcohol, and perhaps even slightly better, Windex for bed cleaning
-
Microfiber cloths or KimWipes for bed cleaning and for the outside of the printer
-
A magnifying task light can be useful along with a small razor blade kit (do yourself a favor, get one like the one linked with a small cutting mat!) to examine print quality, trim minor imperfections and the like.
-
A soldering iron with heat insert kit is cheap and makes life easier dealing with inserts.
-
Paint markers and a few Sharpies are useful for marking filaments and settings on temp towers and calibration prints.
-
Completely non-obvious, but I keep multiple painters tools in my shop toolbox, in my tool punch, and in my 3d project area. You can use it to push in heat-set inserts the last mm to ensure it’s sitting flush and flat, use it to de-brim printed objects, and more.
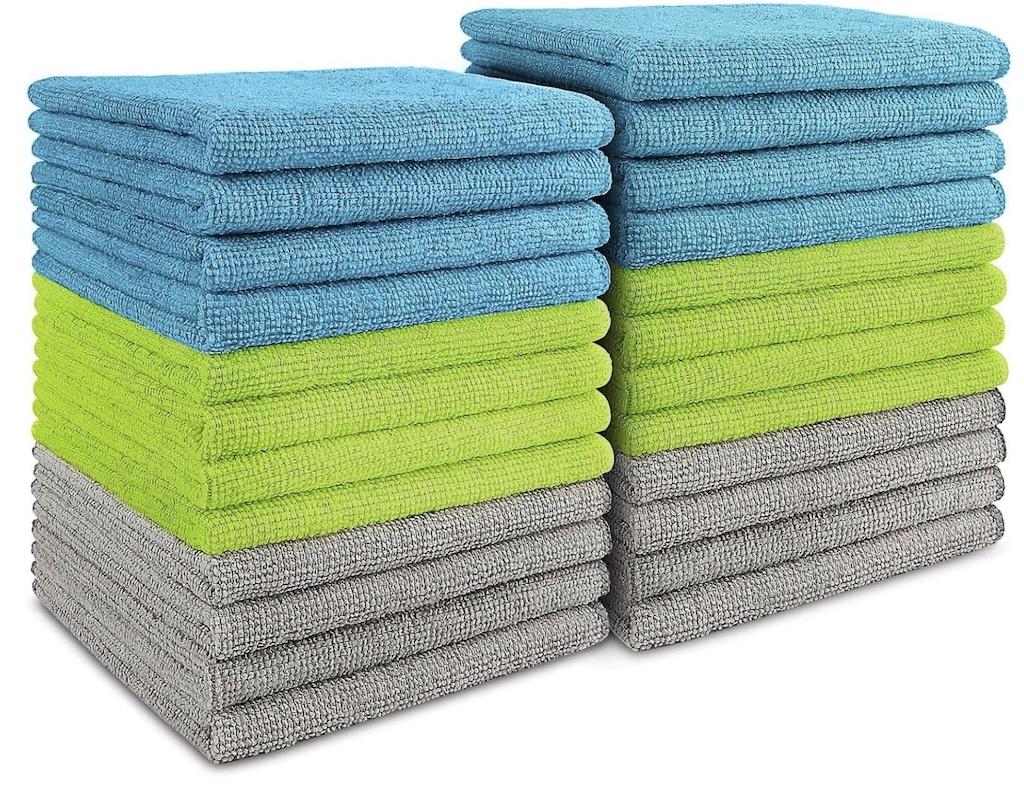
I use either microfiber cloths or KimWIpes for print bed cleaning
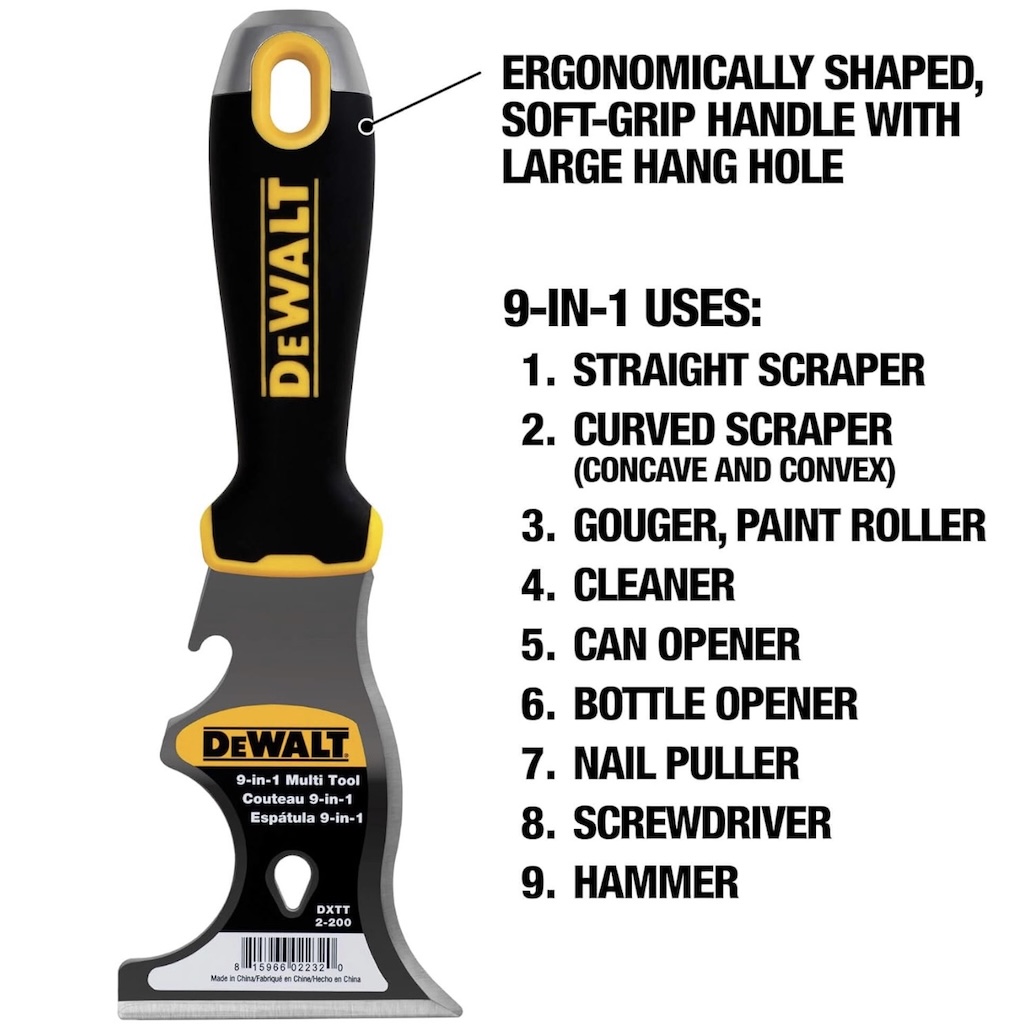
A multi-purpose painters tool comes in surprisingly handy for 3D printing projects and more.
There can be more than you thought to this 3D printing thing, huh?
But the more you’re prepared, the more you realize you can actually do with 3D printing, which is really pretty awesome when you think about it! It’s not quite the Star Trek replicator, but with a few odds and ends, you can really build some amazing things!