3D Printing Workflow and your first prints
Congratulations - you’ve got your new printer!
Now what?
Let’s start with the basics and talk about workflow briefly
I know you immediately want to get to printing. I suspect a mahjority of us felt exactly the same way. If you’re reading while waiting for your printer to arrive (or possibly be ordered yet), that’s great. I can tell you my own first ever print wound up being an airfull of spaghetti, which I thankfully stopped, and it was down to a very simple single reason - not really having the simple workflow locked down, and I had assumed a ‘new from the package’ printing plate was in fact ‘ready to print.’ (It mostly was, but not quite - it needed to be cleaned and alcohol wiped).
Let’s try to make sure your first prints are successful ones!
Refer to your printer instructions or quic-start guide. Most printers have at least some built-in calibrations to be performed. These range from bed leveing, to all kinds of other things like stepper motor calibration and others. Even if your printer claims to be ‘calibrated from the factory,’ I would still perform the calibration setup as a lot of things can get shaken and moved, and sometimes even dented a bit in shipping. Initial printer calibration for the printer may or may not require filament - follow the manufacturer instructions and go through this process and then return here.
Ok, printer’s calibrated so let’s move on to our first real print!
Generally speaking, every single print is going to follow the same pattern as follows. Don’t worry too much if some of the names are confusing as we’ll cover each of them in turn.
-
Either create your own or download a model for printing
-
Bring the model or project into the slicer software, configure and ‘slice’ it
-
Prepare the printer including filament as required
-
Get the sliced gcode to the printer and print
Let’s start with the first step..
3D Models
While it’s possible to create your own models using software such as FreeCAD, Fusion, or others, most of us, especially the first time after getting as printer, and many even with years of experience, are going to be printing models made by others.
There are currently 2 primary sites with collections of models. Printables is sponsored by Prusa Research, and Makerworld is sponsored by BambuLabs. In most cases, you can use a model project or STL file from anywhere for your specific printer, but do NOT try to use any published ‘gcode’ or ‘bgcode’ directly on a printer not matching yours. This sounds complicated, but there really are only a few types of files:
-
3MF or STEP files - these are effectively ‘project files’ which contain the underlying models but also configuration, and sometimes may offer multiple model variants to choose from to print. It also usually includes proper oriantation of the models for printing. If available, grab these, but they aren’t always available for all models.
-
STL files - This stands for either SteroLiThography, or Standard Triangle Language, depending on who you ask. This is essentially a ‘model description file’ which represents the object to be printed in 3-dimensional space. These files are used to then ‘translate’ and ‘slice’ the model using slicer’ software into code specific to your individual printer.
-
gcode or bgcode - gcode stands for ‘Geometric Code’ and is a type of programming language that is used to issue commands to 3D printers. bgcode is a binary version of the same. You don’t need to learn these, but this is the output of a ‘slicer’ from an STL file than can then be used to tell your printer how to print the object(s) desired. Some specific objects may only be available in gcode or bgcode, which is OK in general, but could potentially cause some temporary printer issues if done incorrectly, so you’re better off using SMF, STEP or STL when at all possible to generate your own gcode for your printer.
A quick word on model licenses
Each model on the various sites generally will have a license section. If they are on Printables or MakerWorld, nearly all(probably all in reality) of them are fine to print for personal use.
Some of them may or may not allow ‘remixing’ which means you use their model or project file as a starting point for your own modifications and subsequent re-publishing.
Finally, most will say if they are or are not allowed to be sold once printed.
All of these things vary model to model - most of them require at least ‘attribution’ which means linking back to the original work in the event you later remix and publish your own models, or print and sell them.
This all may sound complicated, but in reality it isn’t - just scan the License section for models you download and you’ll be fine.
Other sources of model files
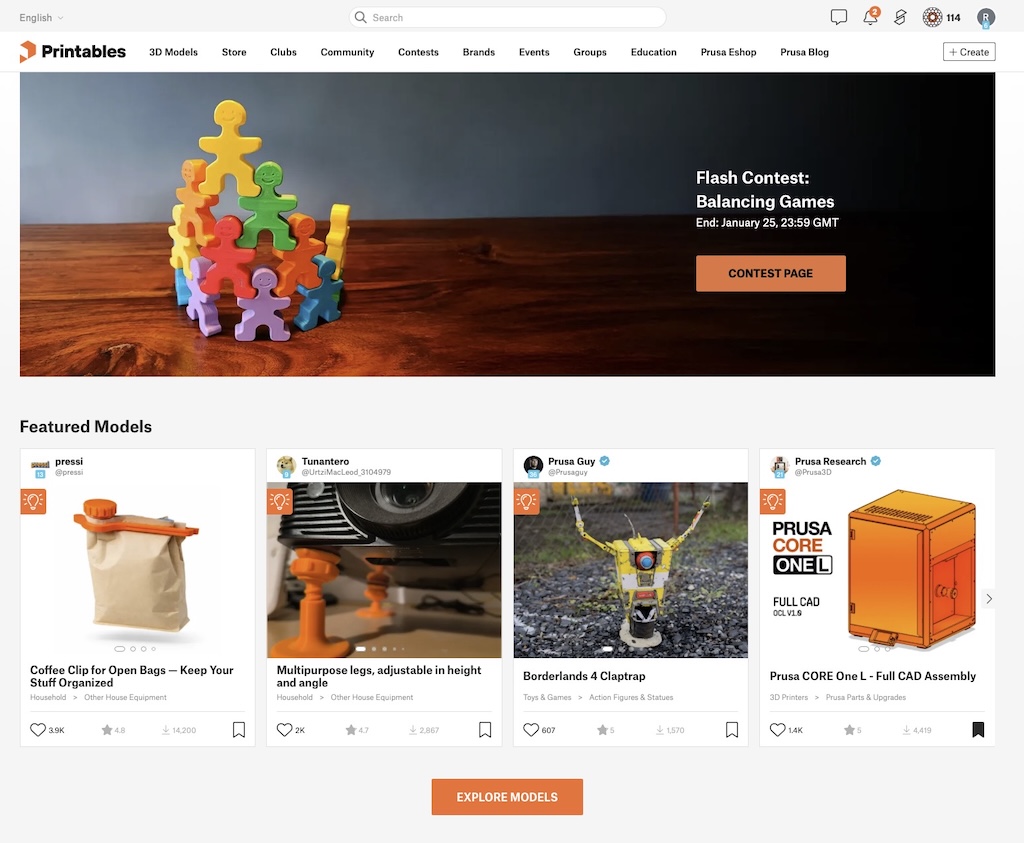
Printables is one of the main sources of freely available models
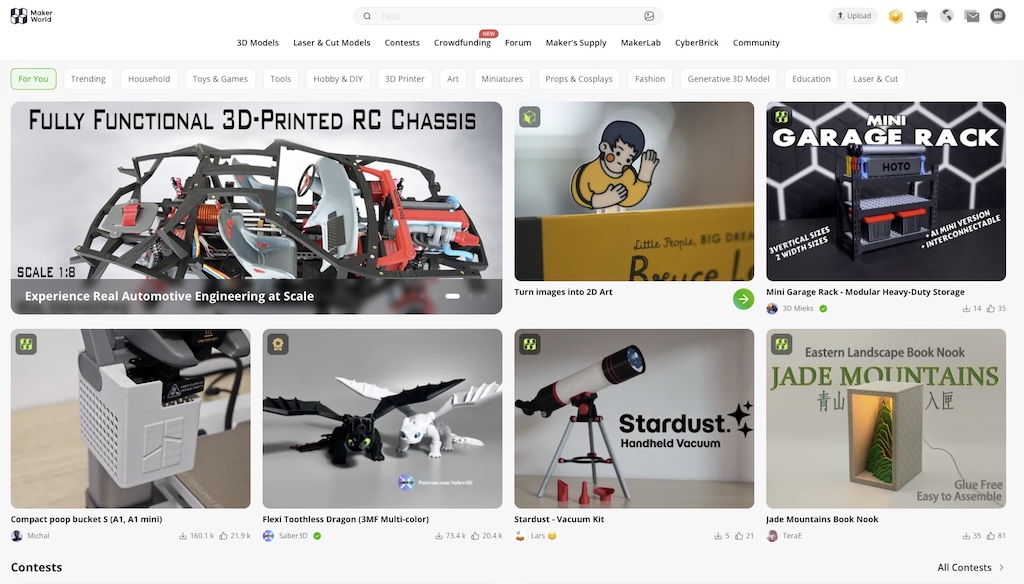
Makerworld is one of the other primary sources for model files
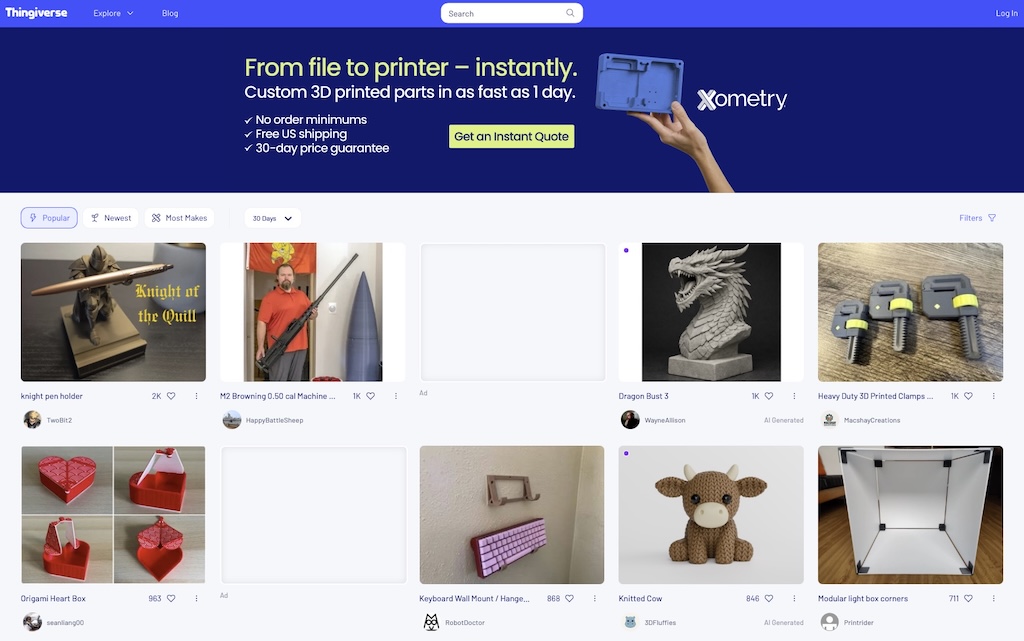
Thingiverse used to be THE one-sto-shop for model STL files but has been somewhat unmaintained over time
Thingiverse was the one stop shop for all model/STL files for a looong time, but the sponsor Ultimaker has sort of moved on out of the consumer space to focus on commercial and industrial 3D printing, so the site has effectively become unmaintained and declining in popularity. Most active modelers have meanwhile re-published their models to Printables and Makerworld, so you can take a look and may occasionally find something only there, but for sanity’s sake, I’d pick a primary site like Printable and stick with it unless you’re really looking for something unique. Personally, I find Printables to be a better overall site, with no ‘interference’ by Prusa, while Makerworld is ok but seems to continue to have more restrictions put in place and is functionally a bit behind Printables, but YMMV.
What’s this ‘EasyPrint’ thing I see on Printables?
So, specifically for Prusa Research printers, there is a service called Prusa Connect. There is also a mobile application. This will give you the option to send your files from the slicer to the printer over your network, as well as for example, monitoring the camera, or you can be fully ‘offline’ if desired, which means you’d need to export your output from the slicer onto a USB key to birng to the printer. Even though I’ve worked in tech for decades and am well aware of network security, I do indeed use Prusa Connect to make my life easier. Other manufacturers will have their own systems, but ‘Easy Print’ will bypass the slicer, and send the gcode directly to your Prusa Connect registered printer. I tend to not use it, as I’d prefer to have the 3MF or STL in my library of things I’ve printed, to potentially reprint or even modify later, but - up to you on this one.
Let’s move on and get to the first model to print
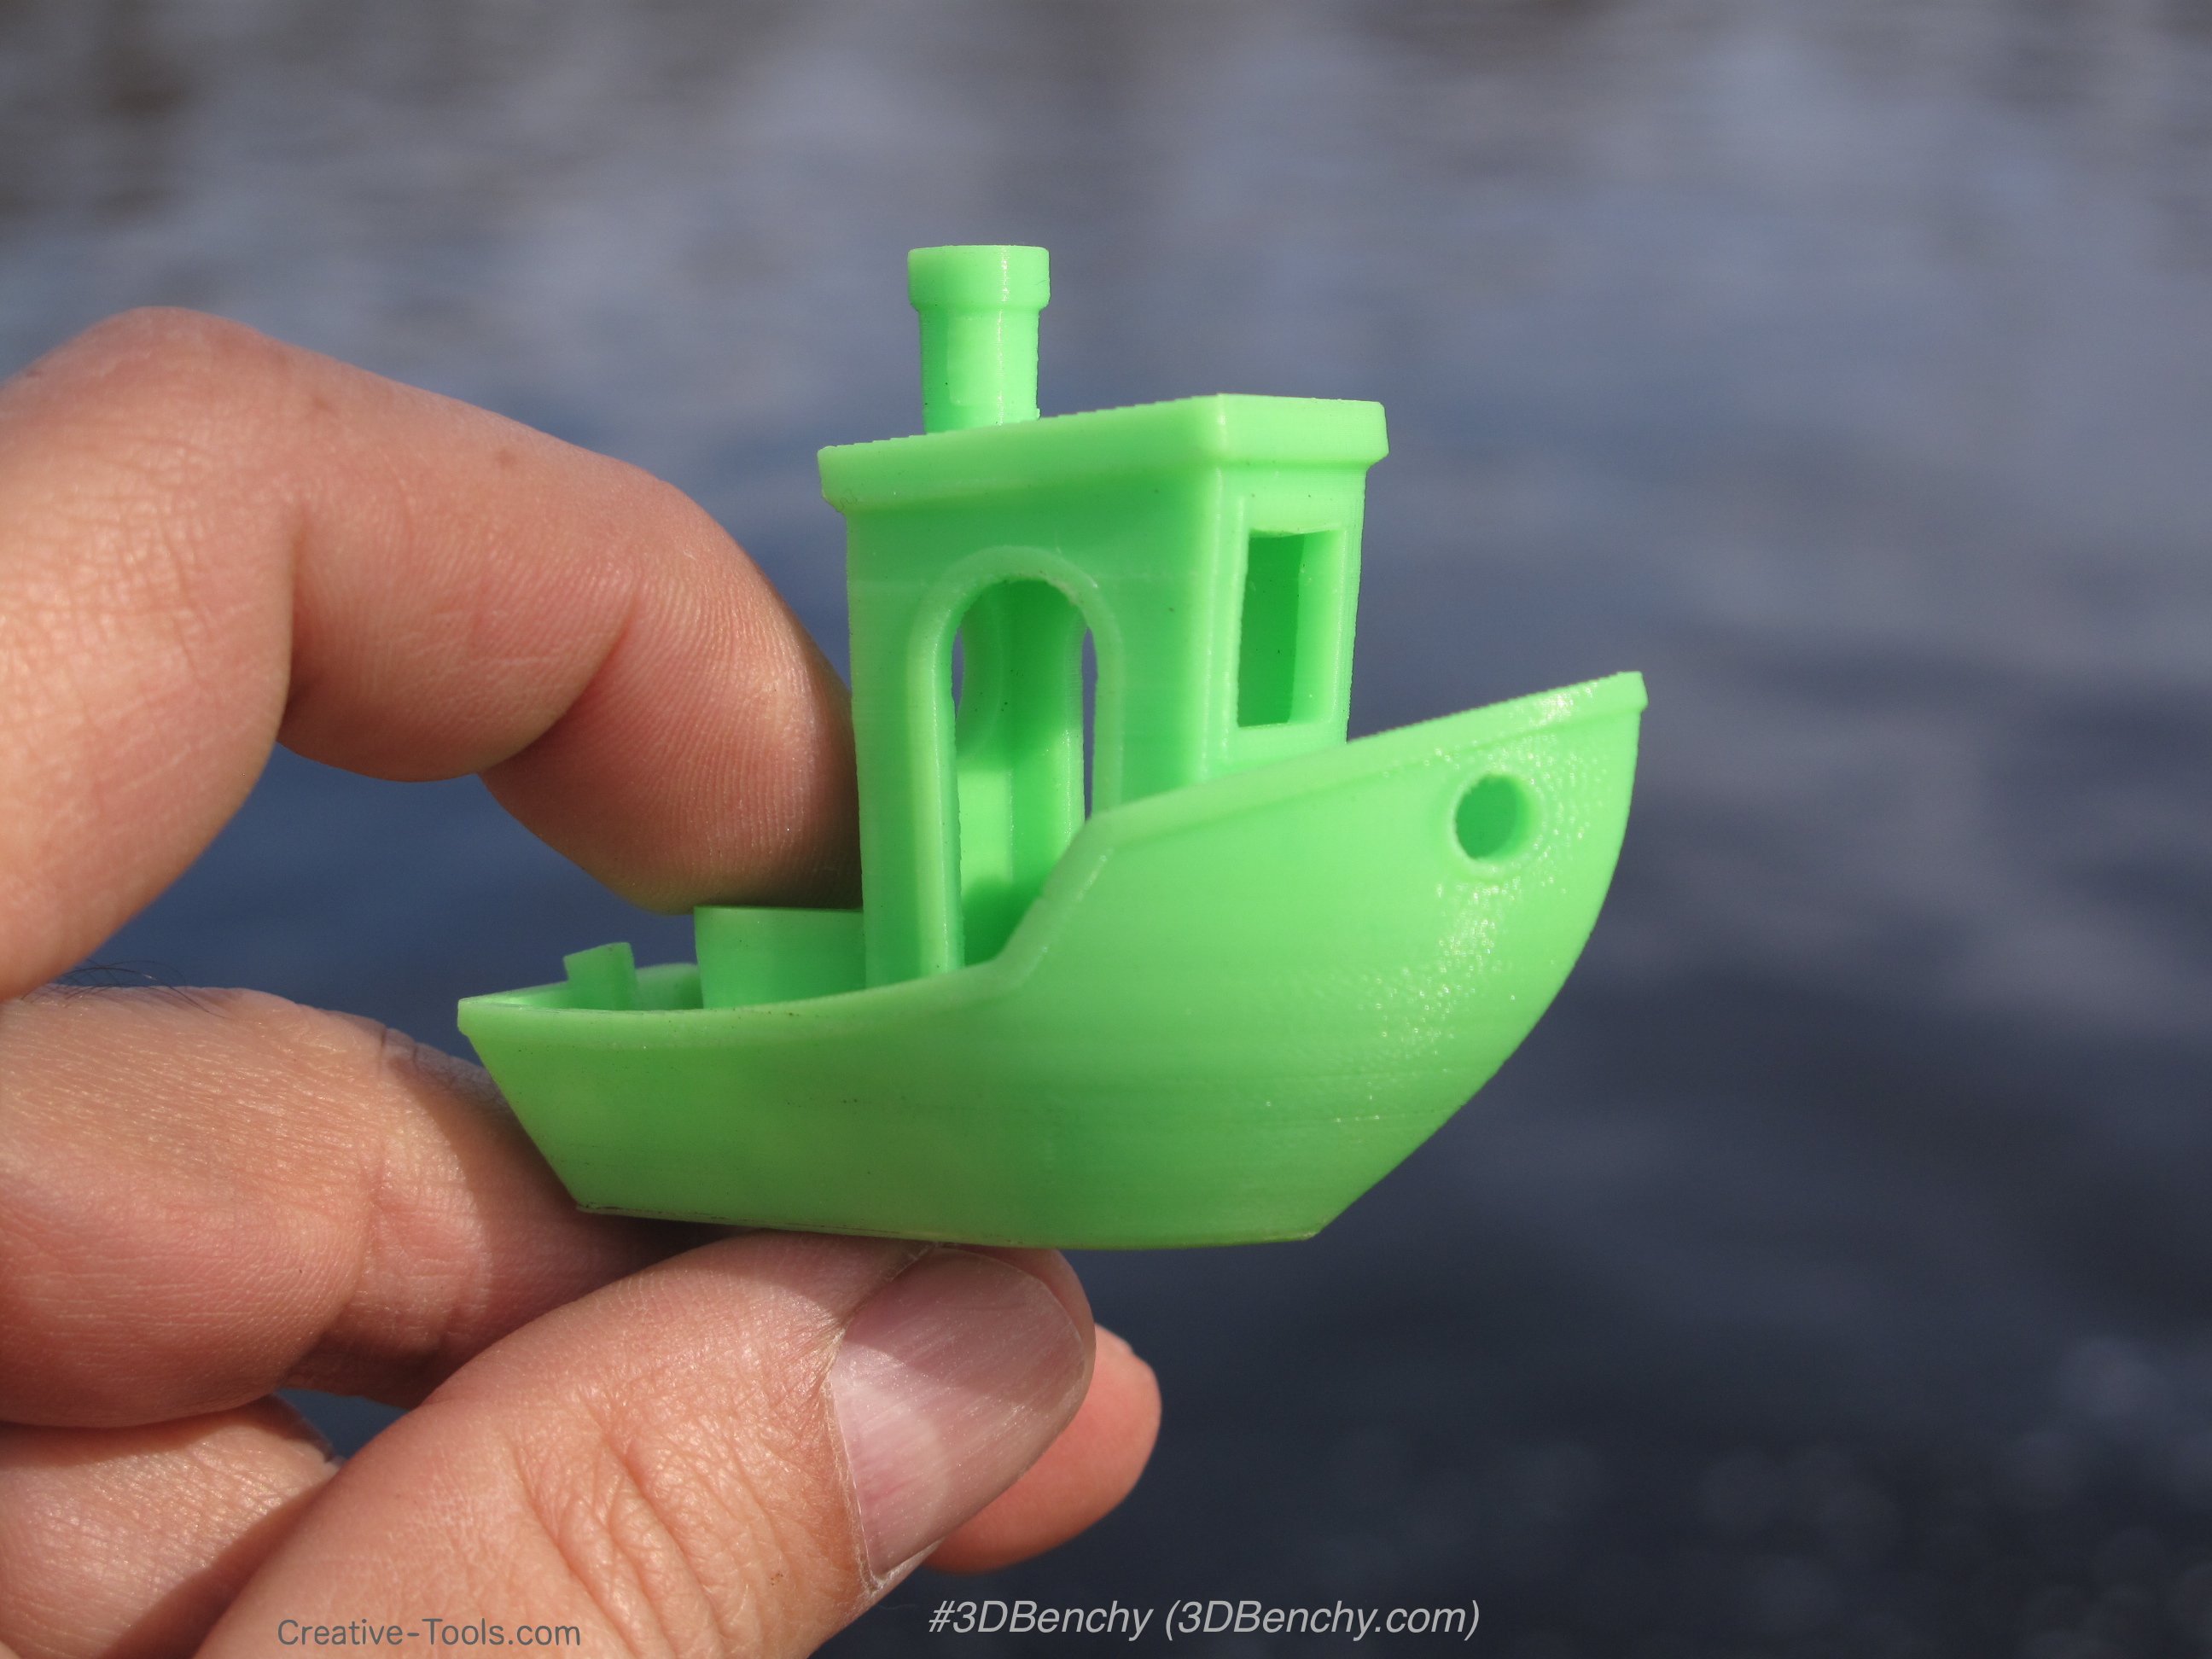
It’s close to a tradition at this point to print.a ‘3d Benchy’ as your first print, which is a small tugboat that can be used as a sanity check for if your printer and filament are performing well. Depending on printer brand, you may have one readily available (for example, Prusa includes 2 versions on their USB key), but I prefer the original to start with, which can be downloaded from Thingiverse as the original version here.
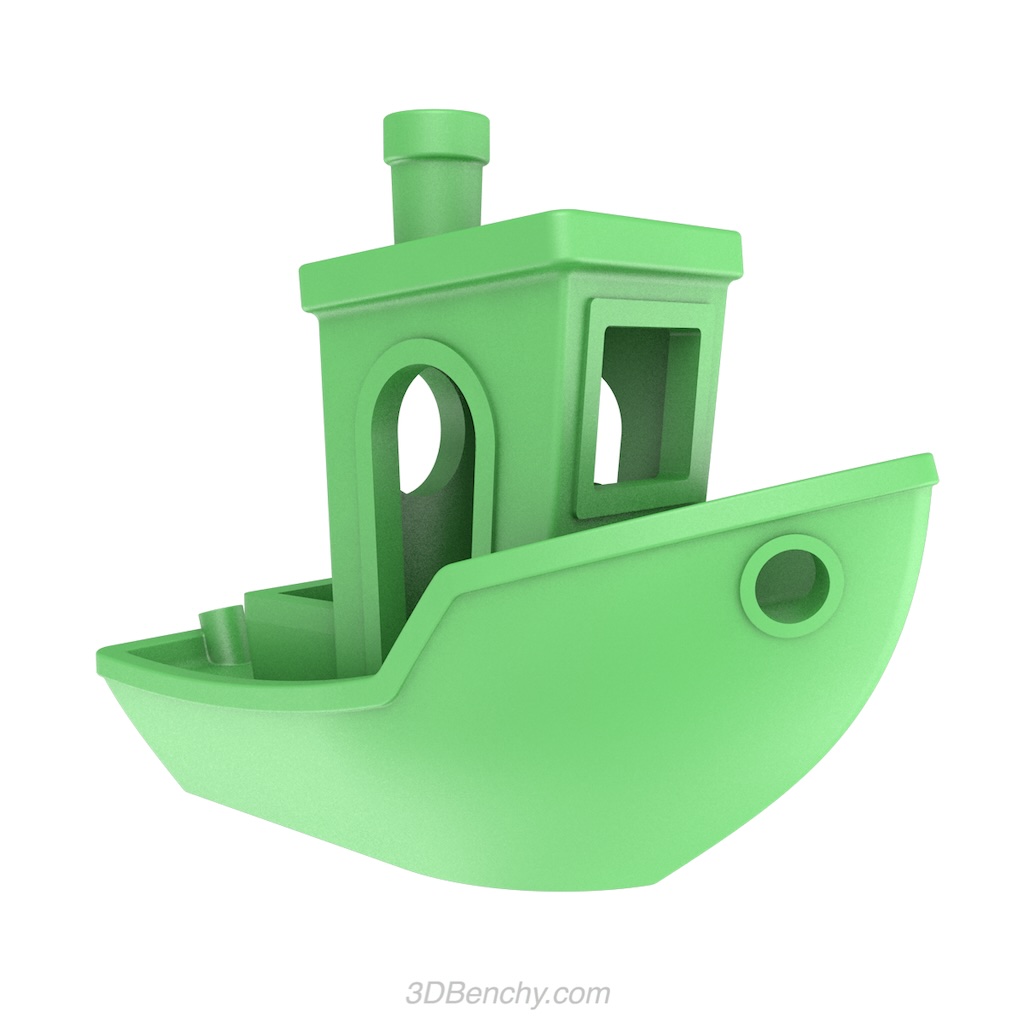
A printed 3D Benchy
Slicing - preparing the model for printing
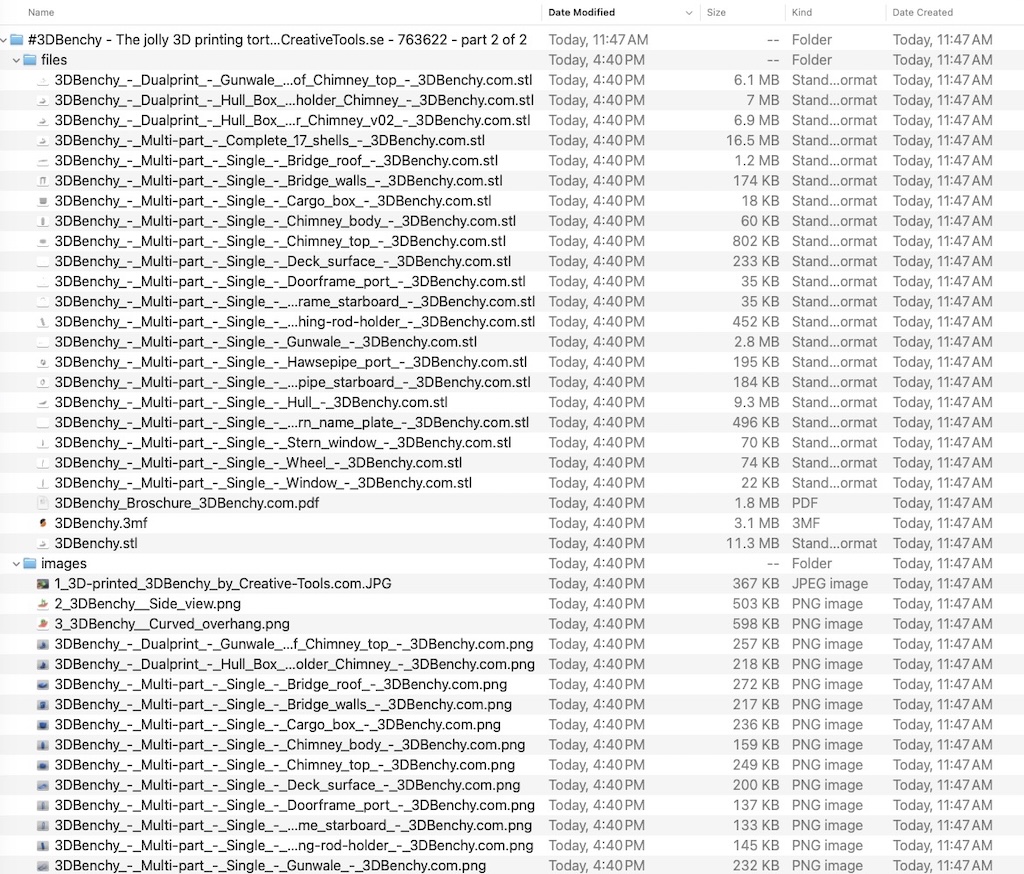
You should now have a zipfile of 3dBency saved off. Go ahead and unzip it if you haven’t and don’t worry too much about ‘all the files’ for now.
We’re going to wind up using the bench .3mf file in our slicer software, but first a brief bit on slicers.
One of the original early slicers was an open source project called Slic3r started way back in 2011 or so with the very much DIY 3D community at the time. It hasn’t had a new release at this point since 2018, but was the one that really started it all.
Prusa Research created a fork of Slic3r, originally naming it Slic3r Prusa Edition and released their first version back in 2016 and sees regular updates since then, now simply named PrusaSlicer.
Bambu Slicer was a fork of PrusaSlicer for BasmbuLab printers and was first released in 2022, and sees regular updates. Orca Slicer was a fork of Bambu Slicer and technically releases the same day or a day earlier than BambuSlicer. Both are still actively maintained today.
Finally, Cura Slicer was originally released by Ultimaker (the company who had sponsored and maintained Thingiverse) released back in 2011. Even though Thingiverse is somewhat abandoned, Cura Slicer remains in active development and possibly has the broadest amount of printer support today.
Great - so what the heck do I install?
While most of the Slicers offer support to some degree, they are not nescessarily optimized for given printers, and may or may not support remote network connectivity to <other printer brands> which makes life easier, so at least for starting out, use PrusaSlicer (and set up Prusa Connect) if you have a Prusa Printer, OrcaSlicer or Bambu Studio for BambuLabs printers, and try Cura for most others unless the printer manufacturer makes a strong case to use something else. There are install versions for both Mac and Windows, and I believe at least some also work on Linux.
Get your slicer of choice installed on your computer, and if there is a network print option like PrusaConnect, make sure to also register and get signed into that system as well.
As you develop experinece with your printer and the slicing software, you may wind up trying out other slicers, but until you’ve got a few dozen successful prints under your belt - stick with one, the one easiest to use for your specific printer.
Import into the Slicer
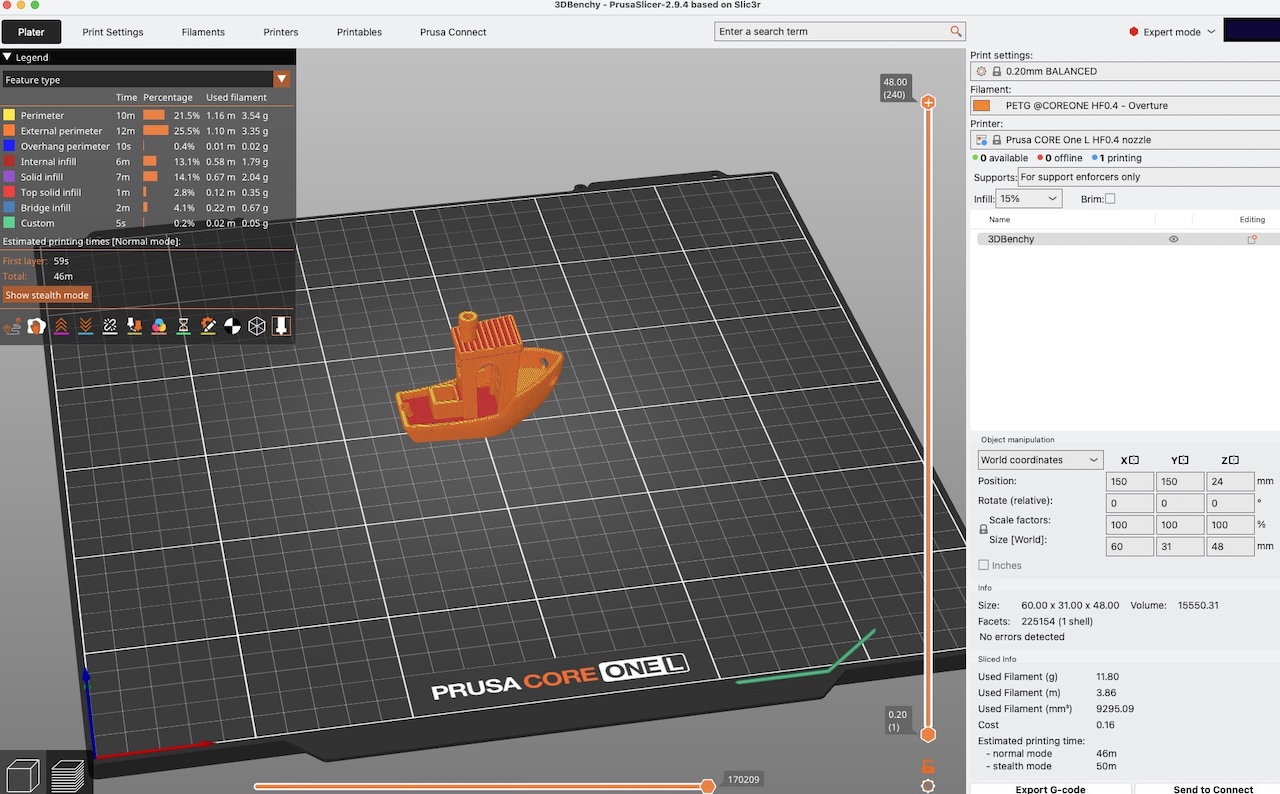
Open the zipfile you downloaded for the 3D Benchy of you haven’t already and open your Slicer. I’ll be using PrusaSlicer but your options should be similar. Instead of the normal ‘add object’ you may see, locate the ‘Open Project’ option or similar. If you look at the 3DBenchy files collection in a file viewer, you’ll see a lot of files there, but the one we really care about is the 3DBenchy.3mf file only (second from the bottom of the ‘Files’ folder on the right).
Go ahead and import the 3DBenchy.3mf file.
This will show something like the below in your slicer once loaded. Note if you have options for beginner, advanced and expert, stick to the beginner setting until you become more comfortable or need to use a more advanced setting!
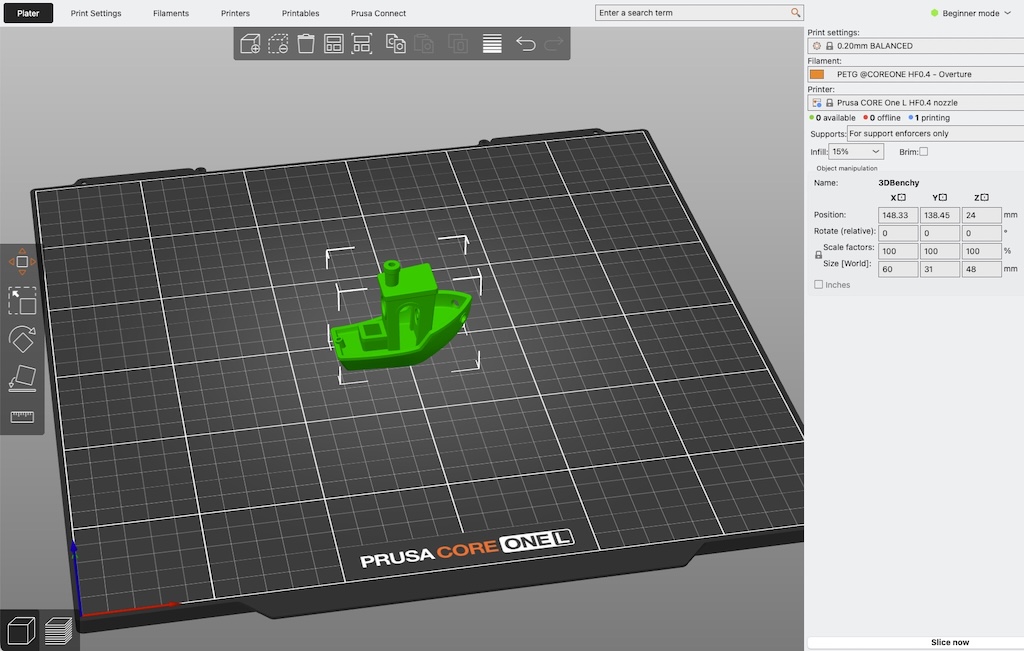
Now, you’ll see what may seem to be an overwhelmng number of icons, buttons and the like. Ignore them all for now and trust me - the ones you’ll need later will become understandable with some time, but notice in the upper right it shows 3 settings which are sort of important:
-
Print Settings - Prusa and some other printers have different base configurations. Prusas are Speed, Balanced, and Structural and in order go from the fastest possible to the slowest, usually with quality ranging from lowest to highest correspondingly. We’ll want to start with ‘Balanced’ or a notch slower/higher quality than any speed setting for your first prints.
-
Filament - I have a ‘tuned’ custom setting for some Overture PETG filament I’m using. For your first prints you should use PLA or PLA+. Your slicer may have an option for the spcific brand of filament you’ll be using, or an entry for ‘generic <type>’ or it’s own filament brand. In order of preference, use an exact match, followed by generic if not available, and only them <printer brand> filament as the last option if needed.
-
Printer - most of us (but not all) have only one, so this should be pre-set and correct.
If you don’t have filament loaded into your printer yet, it’s ok at this point, but choose a PLA (or PLA+/PLA Plus/PLA Pro) filament you have on hand, and select it in the slicer options. It’s important that the type is correct, as this will change a fair number of things from nozzle temperatures used to melt and feed the filament, to fan speeds, bed temperature which strongly impacts first layer adhesion to the bed, print speeds and more. Any of these could potentially turn a simple print into a failed print, and while we won’t drill into customizing them in this article (we will later), it’s important to get the correct basic filament type here.
Also notice the ‘slice now’ option in the lower right
While you can move the object around on the plate, good project files already have the position as well as the object orientation correct, which is one of the nicer things about using 3mf project files. So for now, don’t touch the object, although after we get through the first Benchy print, you can play all day long, and even after ‘slicing’ it still won’t be sent to the printer, so it won’t cause any harm, Undo exists on most or all slicers, and you can always restart from the default file if need be. If at some point you’ve made changes, always save off your own 3MF file to make sure you have a way back to ‘fresh’ without having to re-download the package. Oh, and if you happen to rotate the plate or zoom in and out (mouse wheel), don’t worry about it - these actions are only changing the view, not how the model is sliced for the printer.
So - let’s slice it!
Confirming your settings already overed (Print Setting, Filament, and Printer), go ahead and hit the ‘SLice’ or ‘Slice now’ button. If your slicer has different opitions, and one of them includes sending to the printer, don’t do that yet!
Confirming your settings already overed (Print Setting, Filament, and Printer), go ahead and hit the ‘SLice’ or ‘Slice now’ button. If your slicer has different opitions, and one of them includes sending to the printer, don’t do that yet!
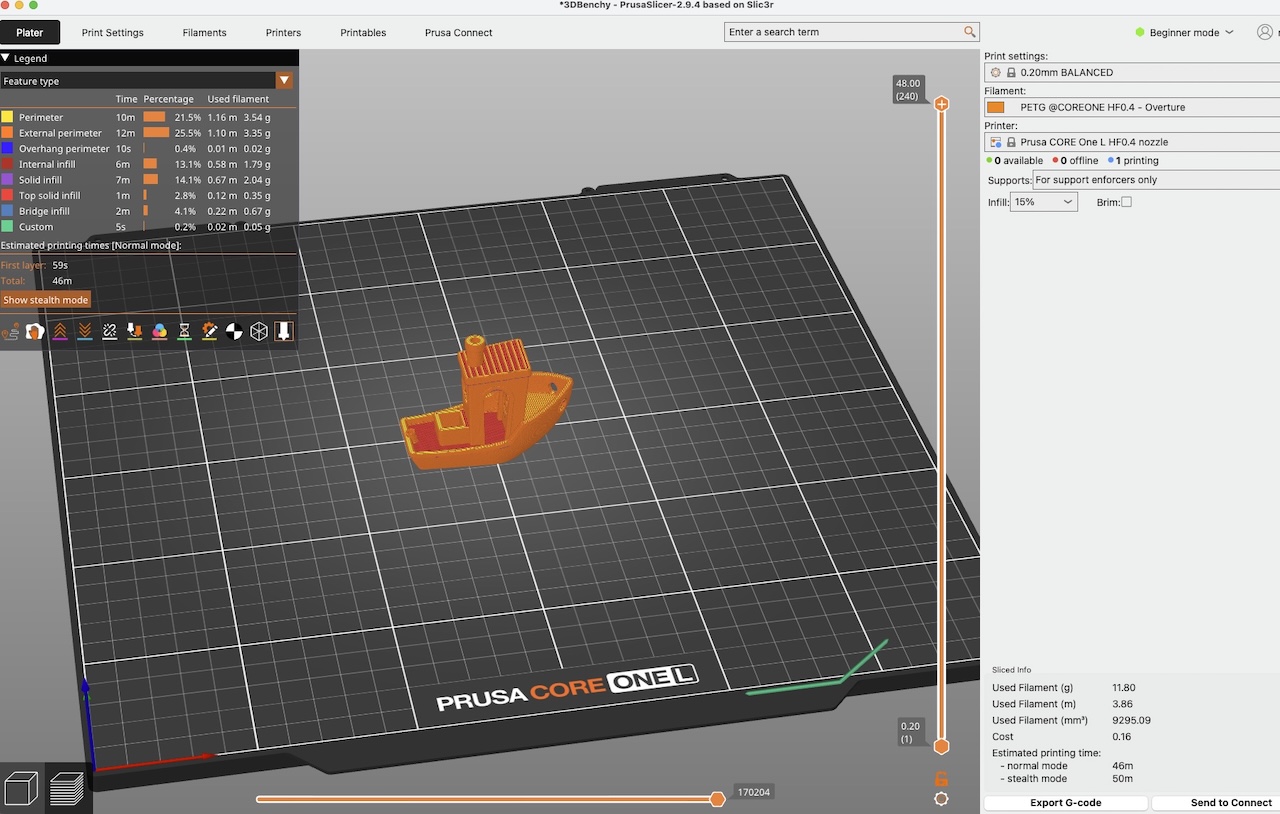
Almost ready to print!
You’ll note the view in slicer has changed - the colors are different, and the options in the lower right have changed to ‘export G-Code’ or ‘Send to Connect.’
The view has technically also changed into layer mode. The slice operation took the 3D model and built out a plan to print it, a single layer at a time, with hundreds or even thousands of layers per print.
You may notice on the lower left there are two icons - a cube, which is the 3D editor view, and lets you select and move objects around, clone or add more, and a stack of sheets, or the preview mode. We won’t need to use the preview mode right now, but the slider on the right will literally let you ‘wal’ throug hthe layers, which for some prints may include some things like temperaturor other setting changes, and is neat to slide up and down a few times for the heck of it now.
Congratulations! We’re now finally ready to make sure the printer is ready to print!
Preparing the printer for print
This is something we need to do each and every time before every single print.
-
Ensure the print bed is clear - remove the build sheet or use a scraper. If you remove the sheet by hand, flexing it in the X and Y directions will help loosen parts off the sheet, but be careful both of small parts and if the sheet is still warm or hot!
-
Ensure the print sheet is clean. Not ‘looks good’ but CLEAN. At minimum some isoproply alcohol in a spray bottle and some KimWipes or a microfiber. If your printer leaves a ‘wipe line or purge line, make sure to scrape or clean that off as well! Note the alcohol will evaoprate much quicker if the sheet is still warm. And yes, this includes ‘just’ your fingerprints, as fingerprints have oils on them and can stop the filament from sticking. It’s quick - just make this a habit before every single print. If you still have first layer adhesion issues, use some water and a drop of Dawn sish soap, followed by the alcohol, but use a wrung rag or remove the sheet entirely for the dish soap and water if in doubt.
-
Ensure your filament is loaded and ready to go. This includes being the right type you specified in Slicer for the print, in this case it should be (any color) PLA or PLA+. Refer to your speciifc printer’s instructions on how to load/unload/change filament, and if you’re removing a spool, do consider checking out the filament drying section as to how to store it properly!
-
Ensure your printer is in the Ready or Idle state. If any jobs are queued or paused, you’ll need to address them before you can send your print, in this case the 3D Benchy.
We’re finally ready!

A squirt or two of isoproyl alcohol on a cleared print bed is a mandatory step before each and every print!
Getting the gcode to the printer - aka PRINTING!
We’re finally ready to go. If you have a ‘connected’ printer like mentioned with PrusaConnect, you can now ‘send to connect’ from the Slicer UI in the lower right, or equivalent for your printer. This will start transmitting the gcode to the printer over the network. On Prusa Connect, you can watch the transfer take place, followed by the print starting.
If not, you can ‘export code’ to a USB key, then bring it to the printer, select Print and select the gcode to be printed.
And - we’re printing! But yeah, there’s one more thing...
Always watch the start of your print jobs - at least for the first layer or two
Print jobs can fail for many reasons, including later on in the print, but starting out, especially with simpler models, a singificant portion of them fail on the first layers. It may be down to a not-so-clean print bed/sheet, or incorrect face being down when the object was sliced, wrong filament settings, or a myriad of other issues.
If you just let the print go, you may come back to a huge mess than can take hours and sometimes even take some (relatively chepo but still..) replacement parts if your nozzle becomes encased in melted filament.
Always watch the first few layers - if you start to see buildup on the nozzle, or the printer is ‘printing in air’ and making ‘spaghetti,’ pause, stop or cancel the print immediately until you can sort the issue, clean the plate again and try again. If the first few layers go OK and it’s a simple smaller PLA print, chances are pretty good the rest of the print will go OK.
Congratulations - how did your benchy come out?
There’s a PDF included in the benchy file pacakage itself, which gives some tips and even measurements to check with your printed benchy - it’s worth taking a look to see how close it printed. Don’t worry if you don’t udnerstand it all right now - well done on printing your first Benchy!
Other resources and next steps
At this point, it’s worth both lookingfor other models on Printables or wherever, or if your Benchy didn’t quite come out as planned, taking a look through the Benchy docs and this blog to see if you can figure out what heppened. It’s also worth seeing if your manufacturer or slicer offers any detailed lessons or tutorials, or - just find the next model and keep printing!